Chrome development tools showing there are still some assets that are missing. Fix all of these kinds of errors before moving to the next step.
Custom HTML Skin - Converting an existing site design into a HTML skin
If you are running an event and you want to exactly match the style of your DPG site to an existing site design, you can clone the HTML of the main site to turn it into a skin which can be used with DPG.
Creating a custom skin is entirely optional, for most users the best path is to use our easily customisable templates.
The HTML skin consists of a full page of your HTML code, with DPG inserts added to pull in the gallery and other required code from DPG into the areas that you want it to be displayed.
Many people choose to write the HTML skin for the DPG site themselves, basing it on the code from the main site. In this tutorial however we'll show you a quick way of converting an existing design into a DPG skin.
In this guide we'll be using:
If you don't have a developer on your team but would like a custom HTML skin we can provide this service at an additional cost. Contact support@digitalphotogallery.com for more details.
Clone the HTML to your local disk
Make sure that you have Homebrew installed and then run the command to install wget:
brew install wget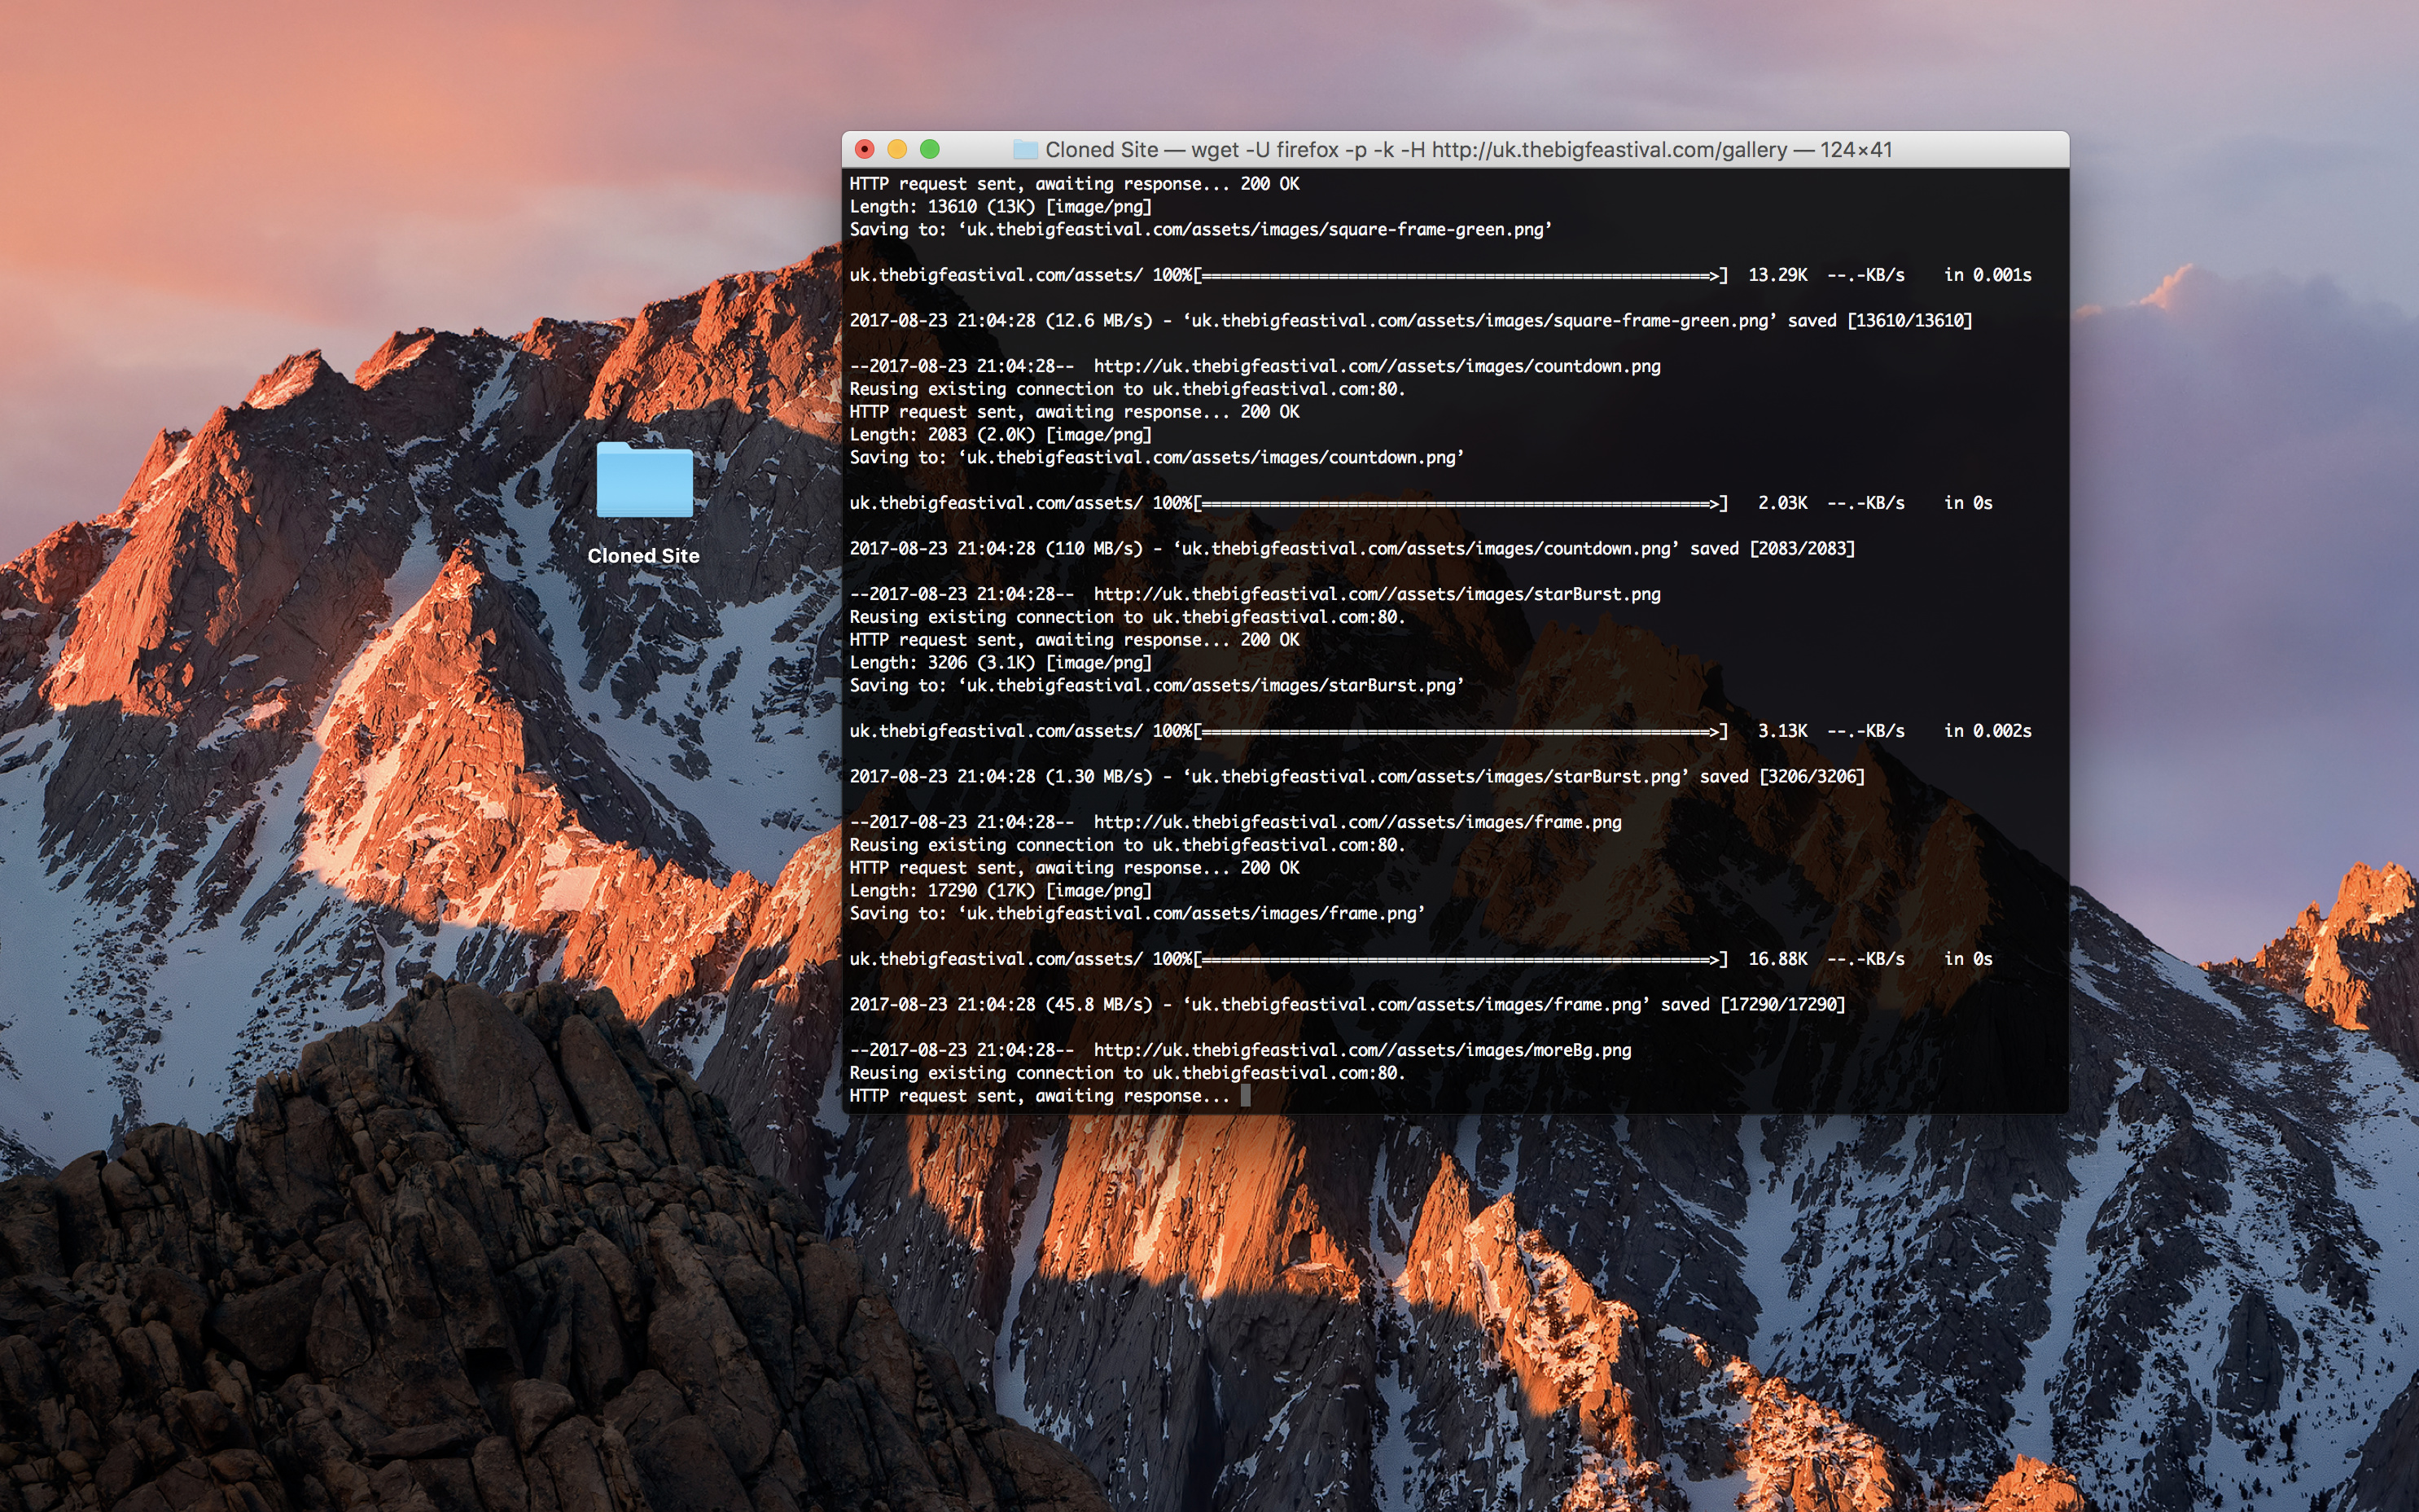
Create a new folder, cd to it and use the following command to clone the assets from the website that you are integrating with:
wget -U firefox -p -k -H http://www.targetdomain.com/Upload assets to your own server or CDN
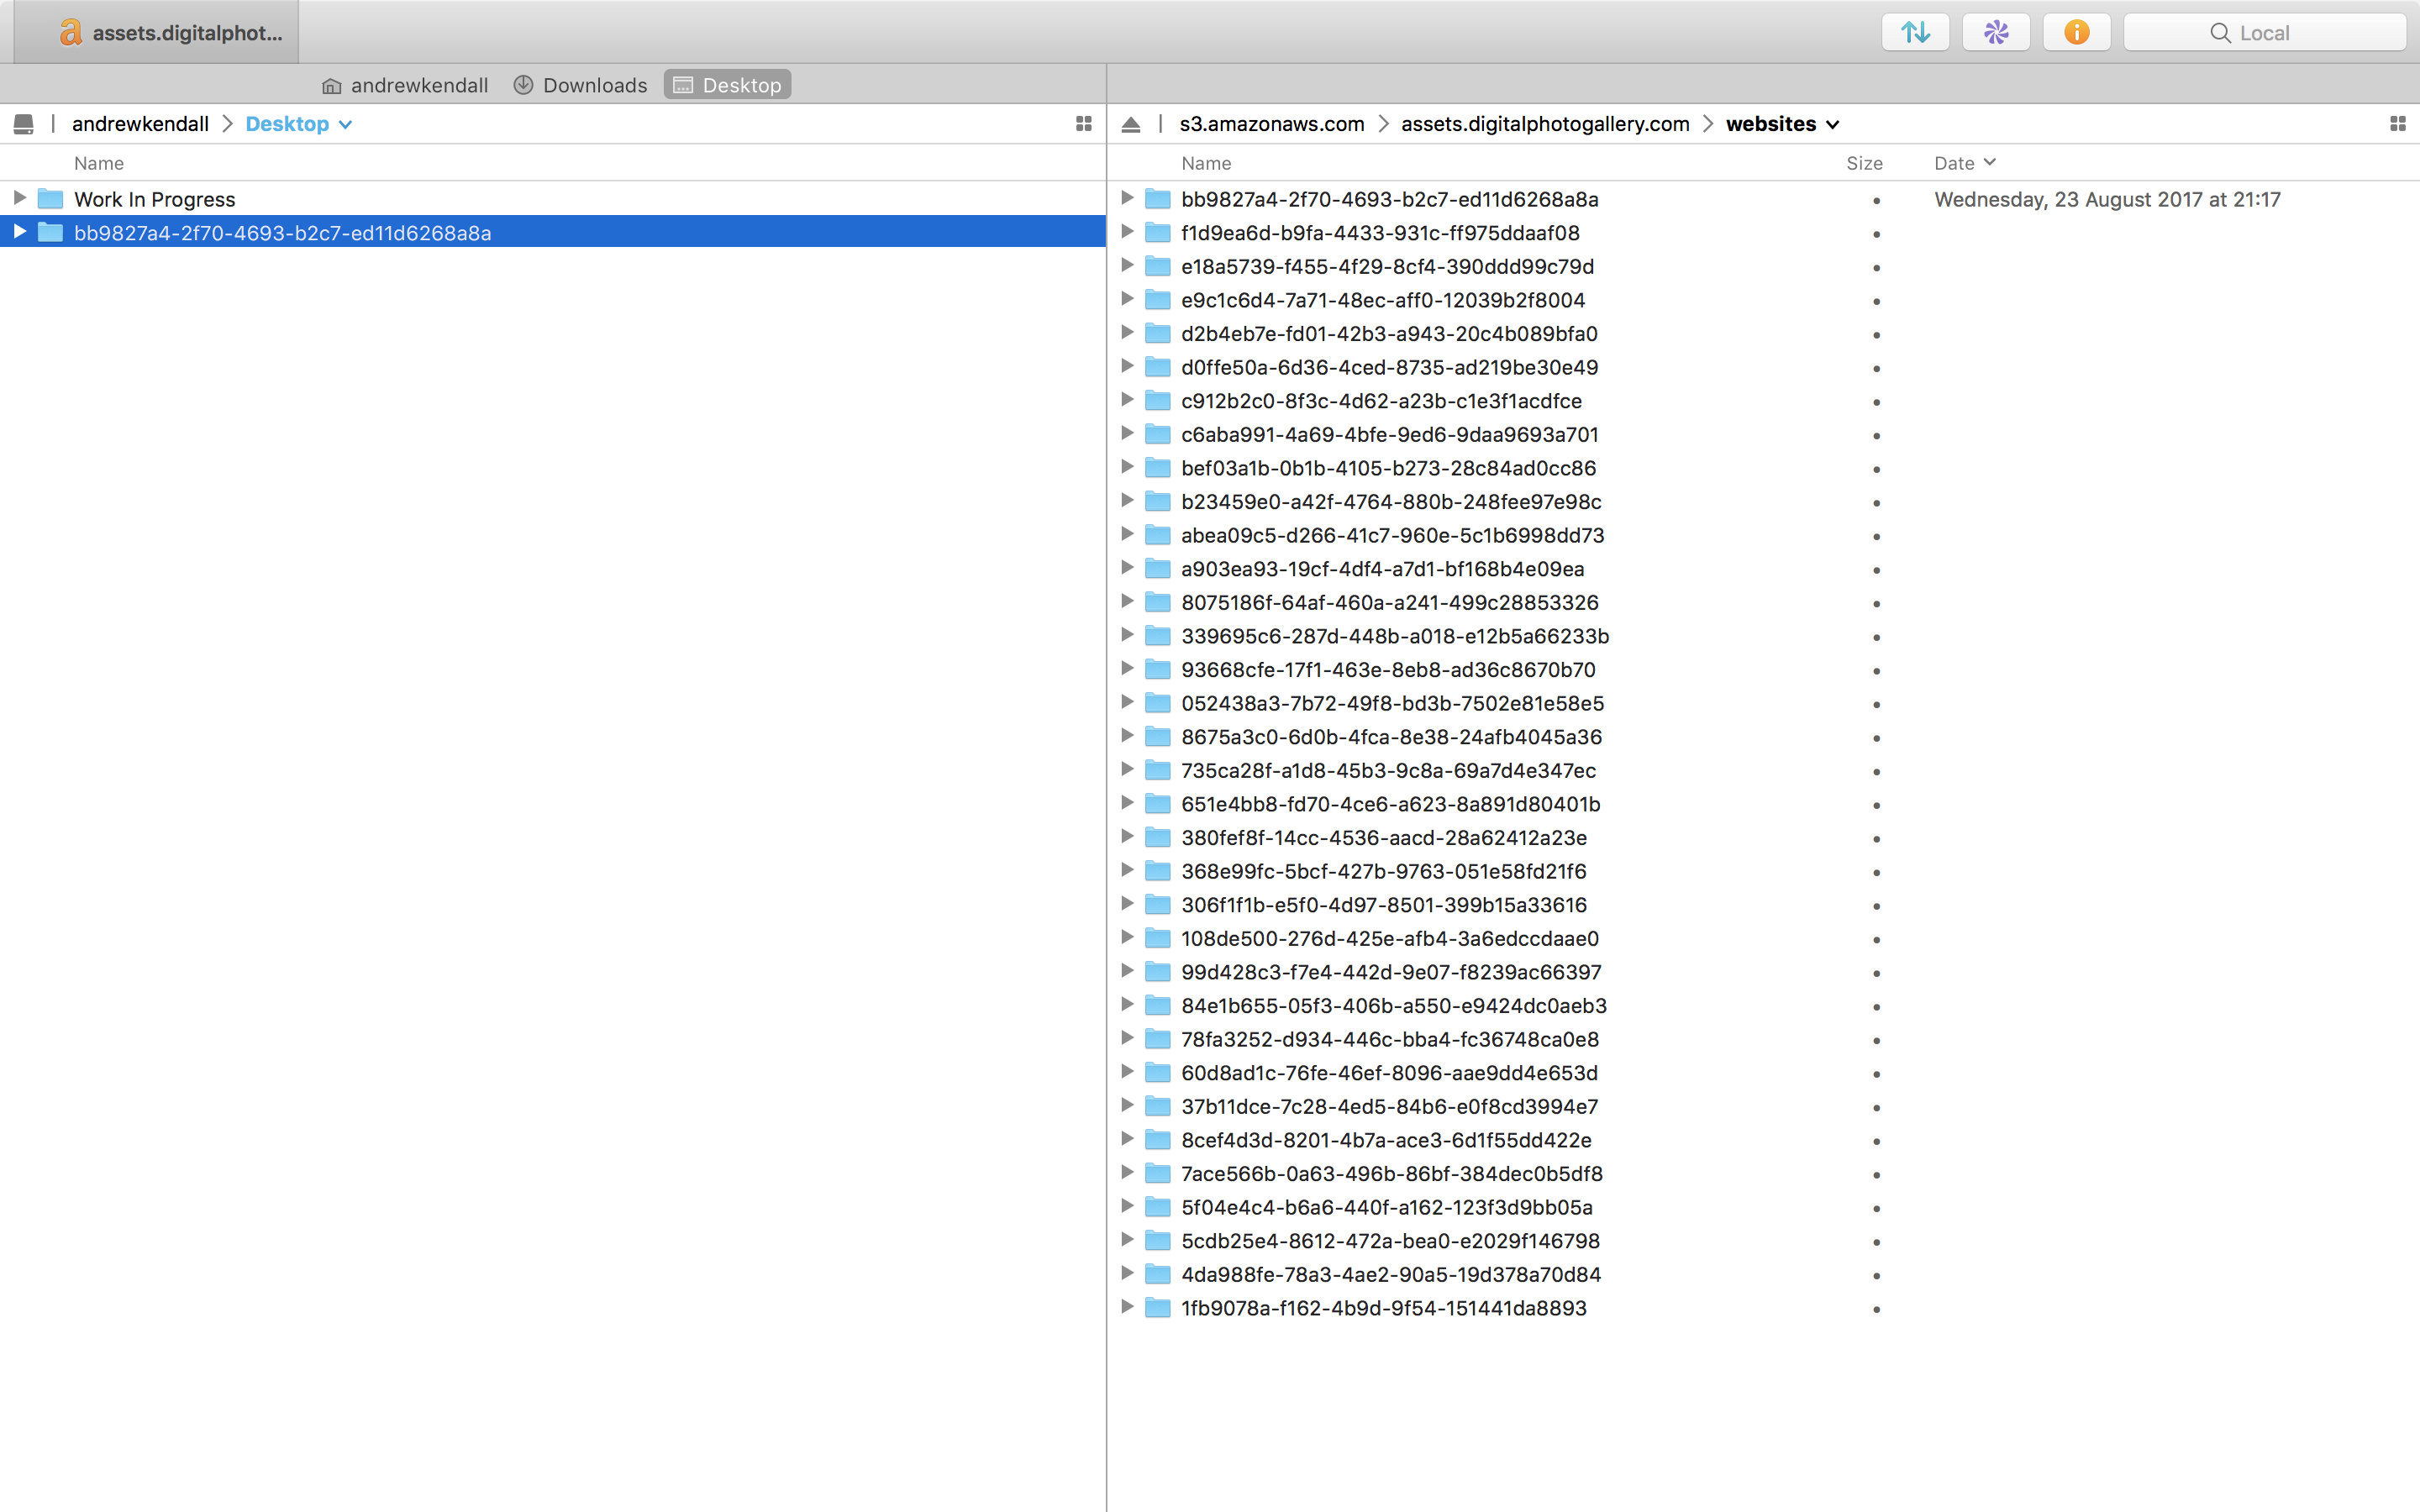
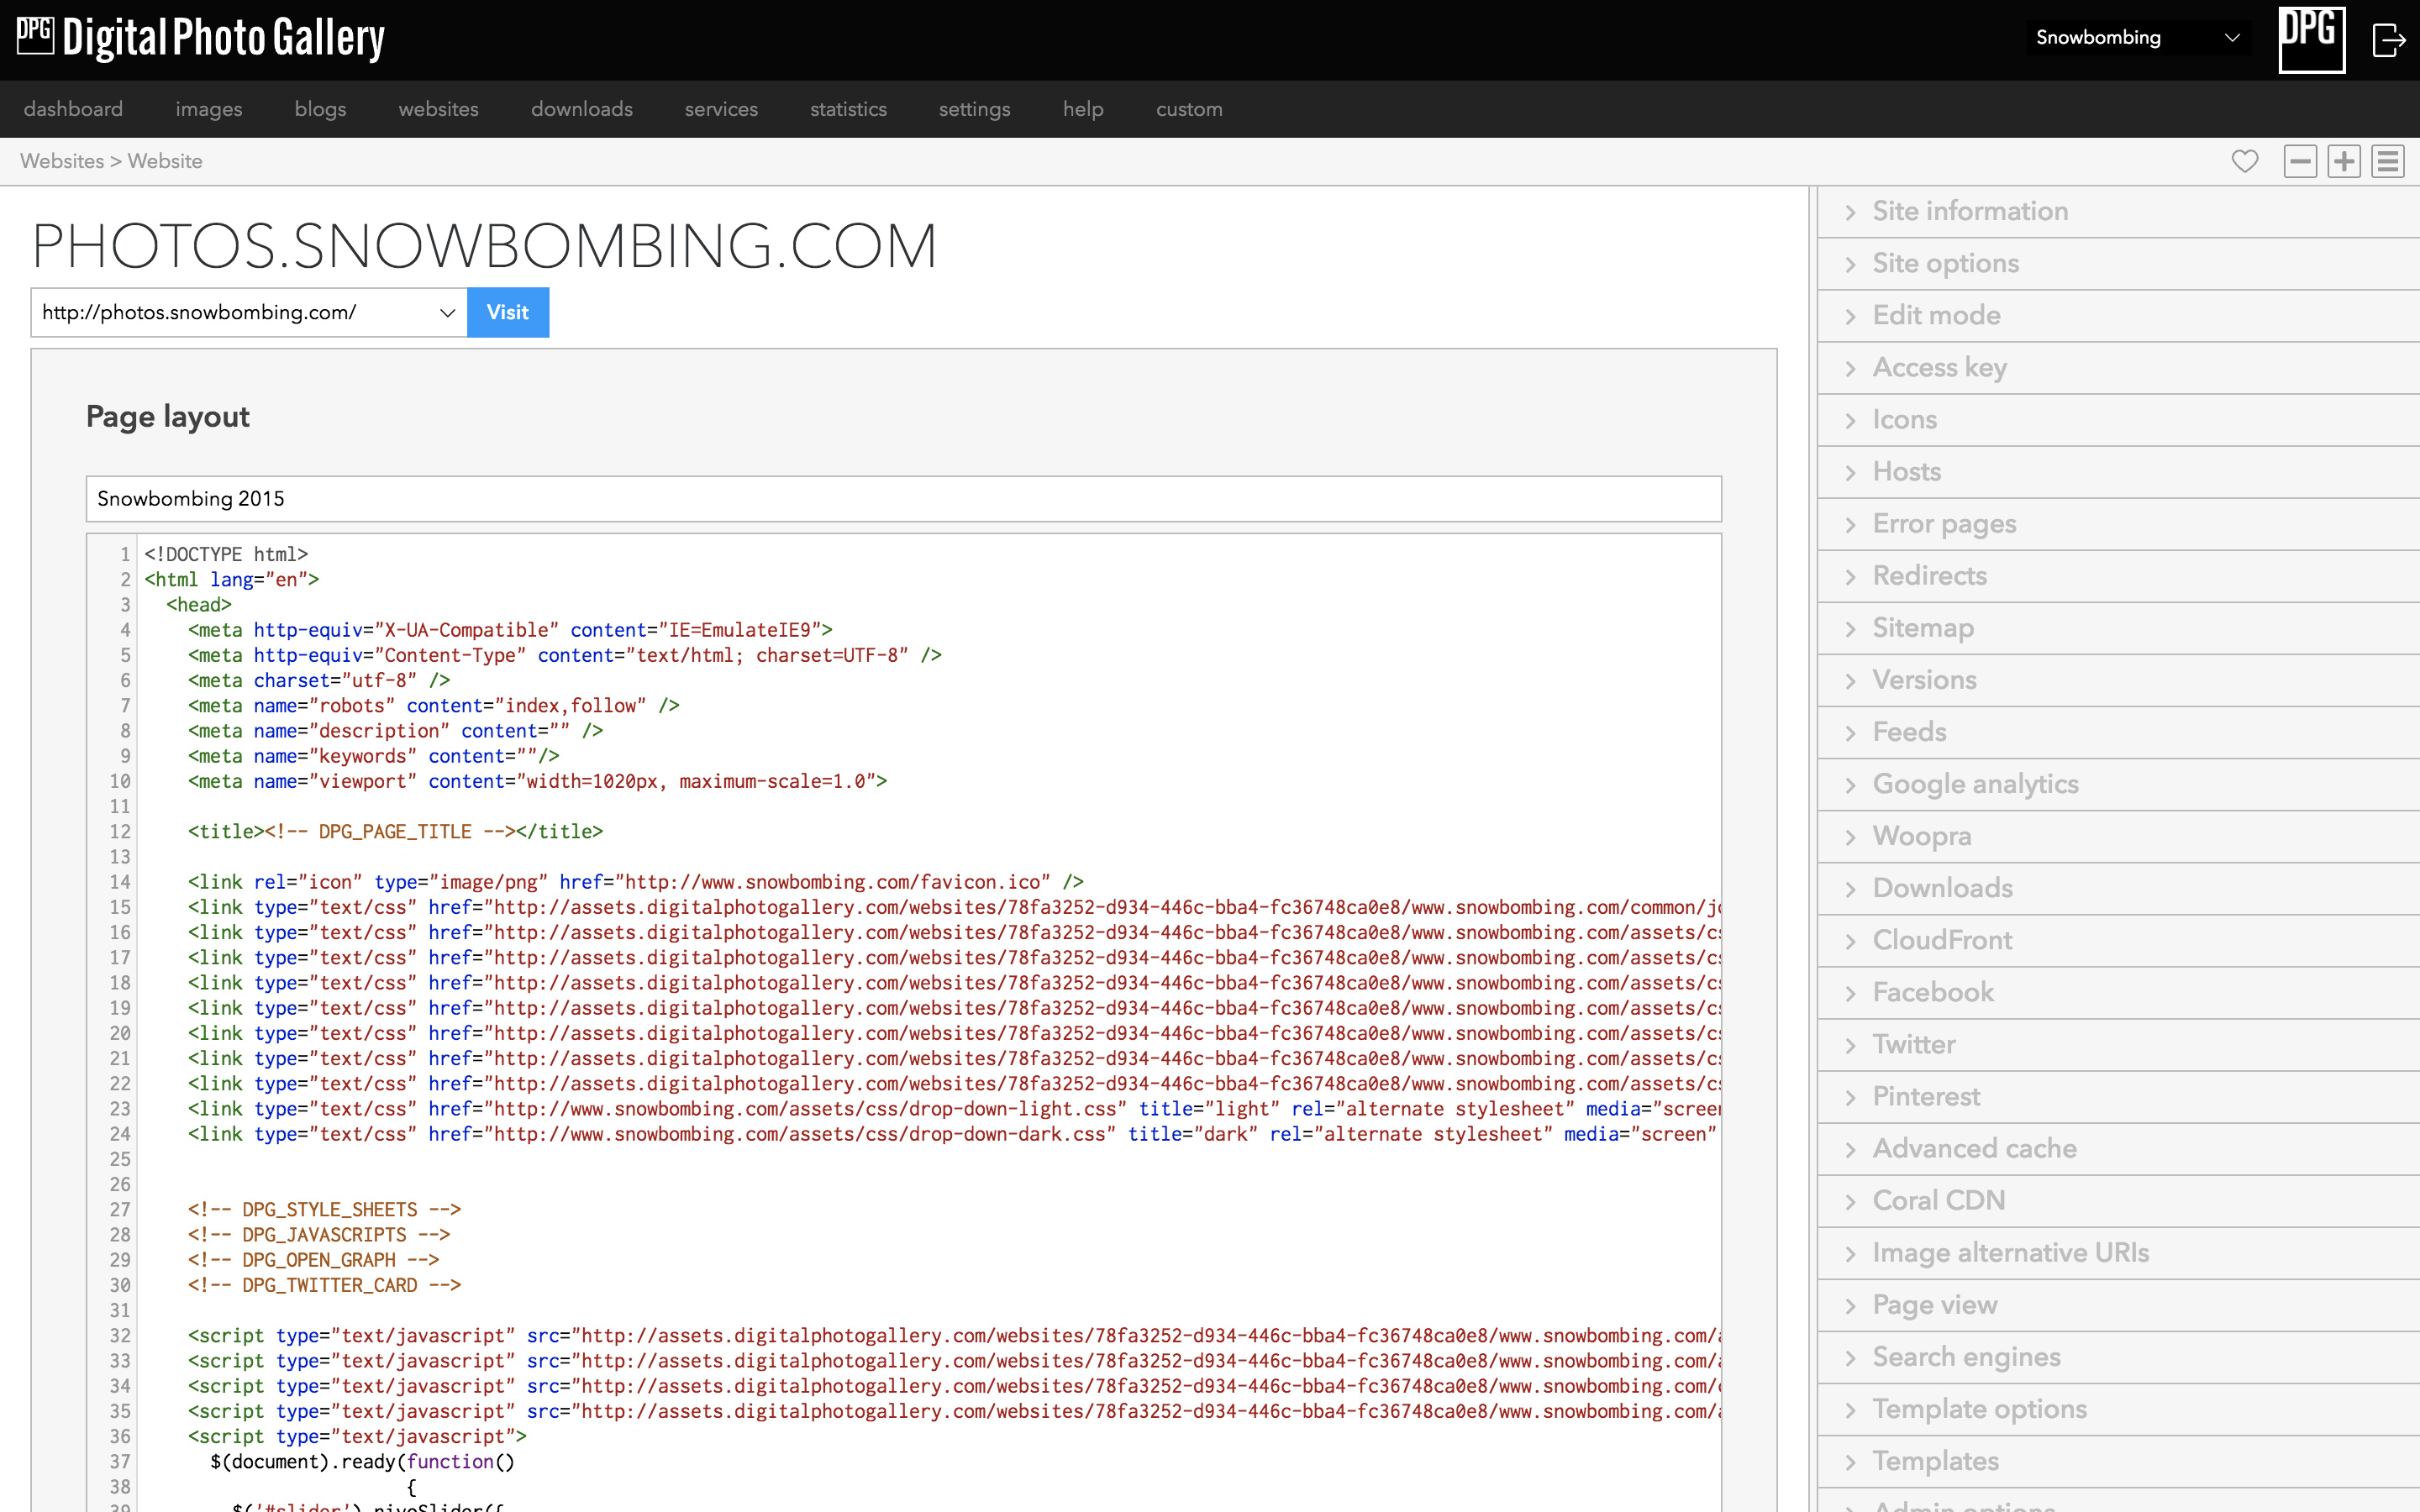
Upload your cloned assets to somewhere accessible online, in this example I am using Transmit with Amazon S3.
If you have full control of the main site and you have predictable asset locations then you can link to those assets rather than cloning them.
Re-link all assets
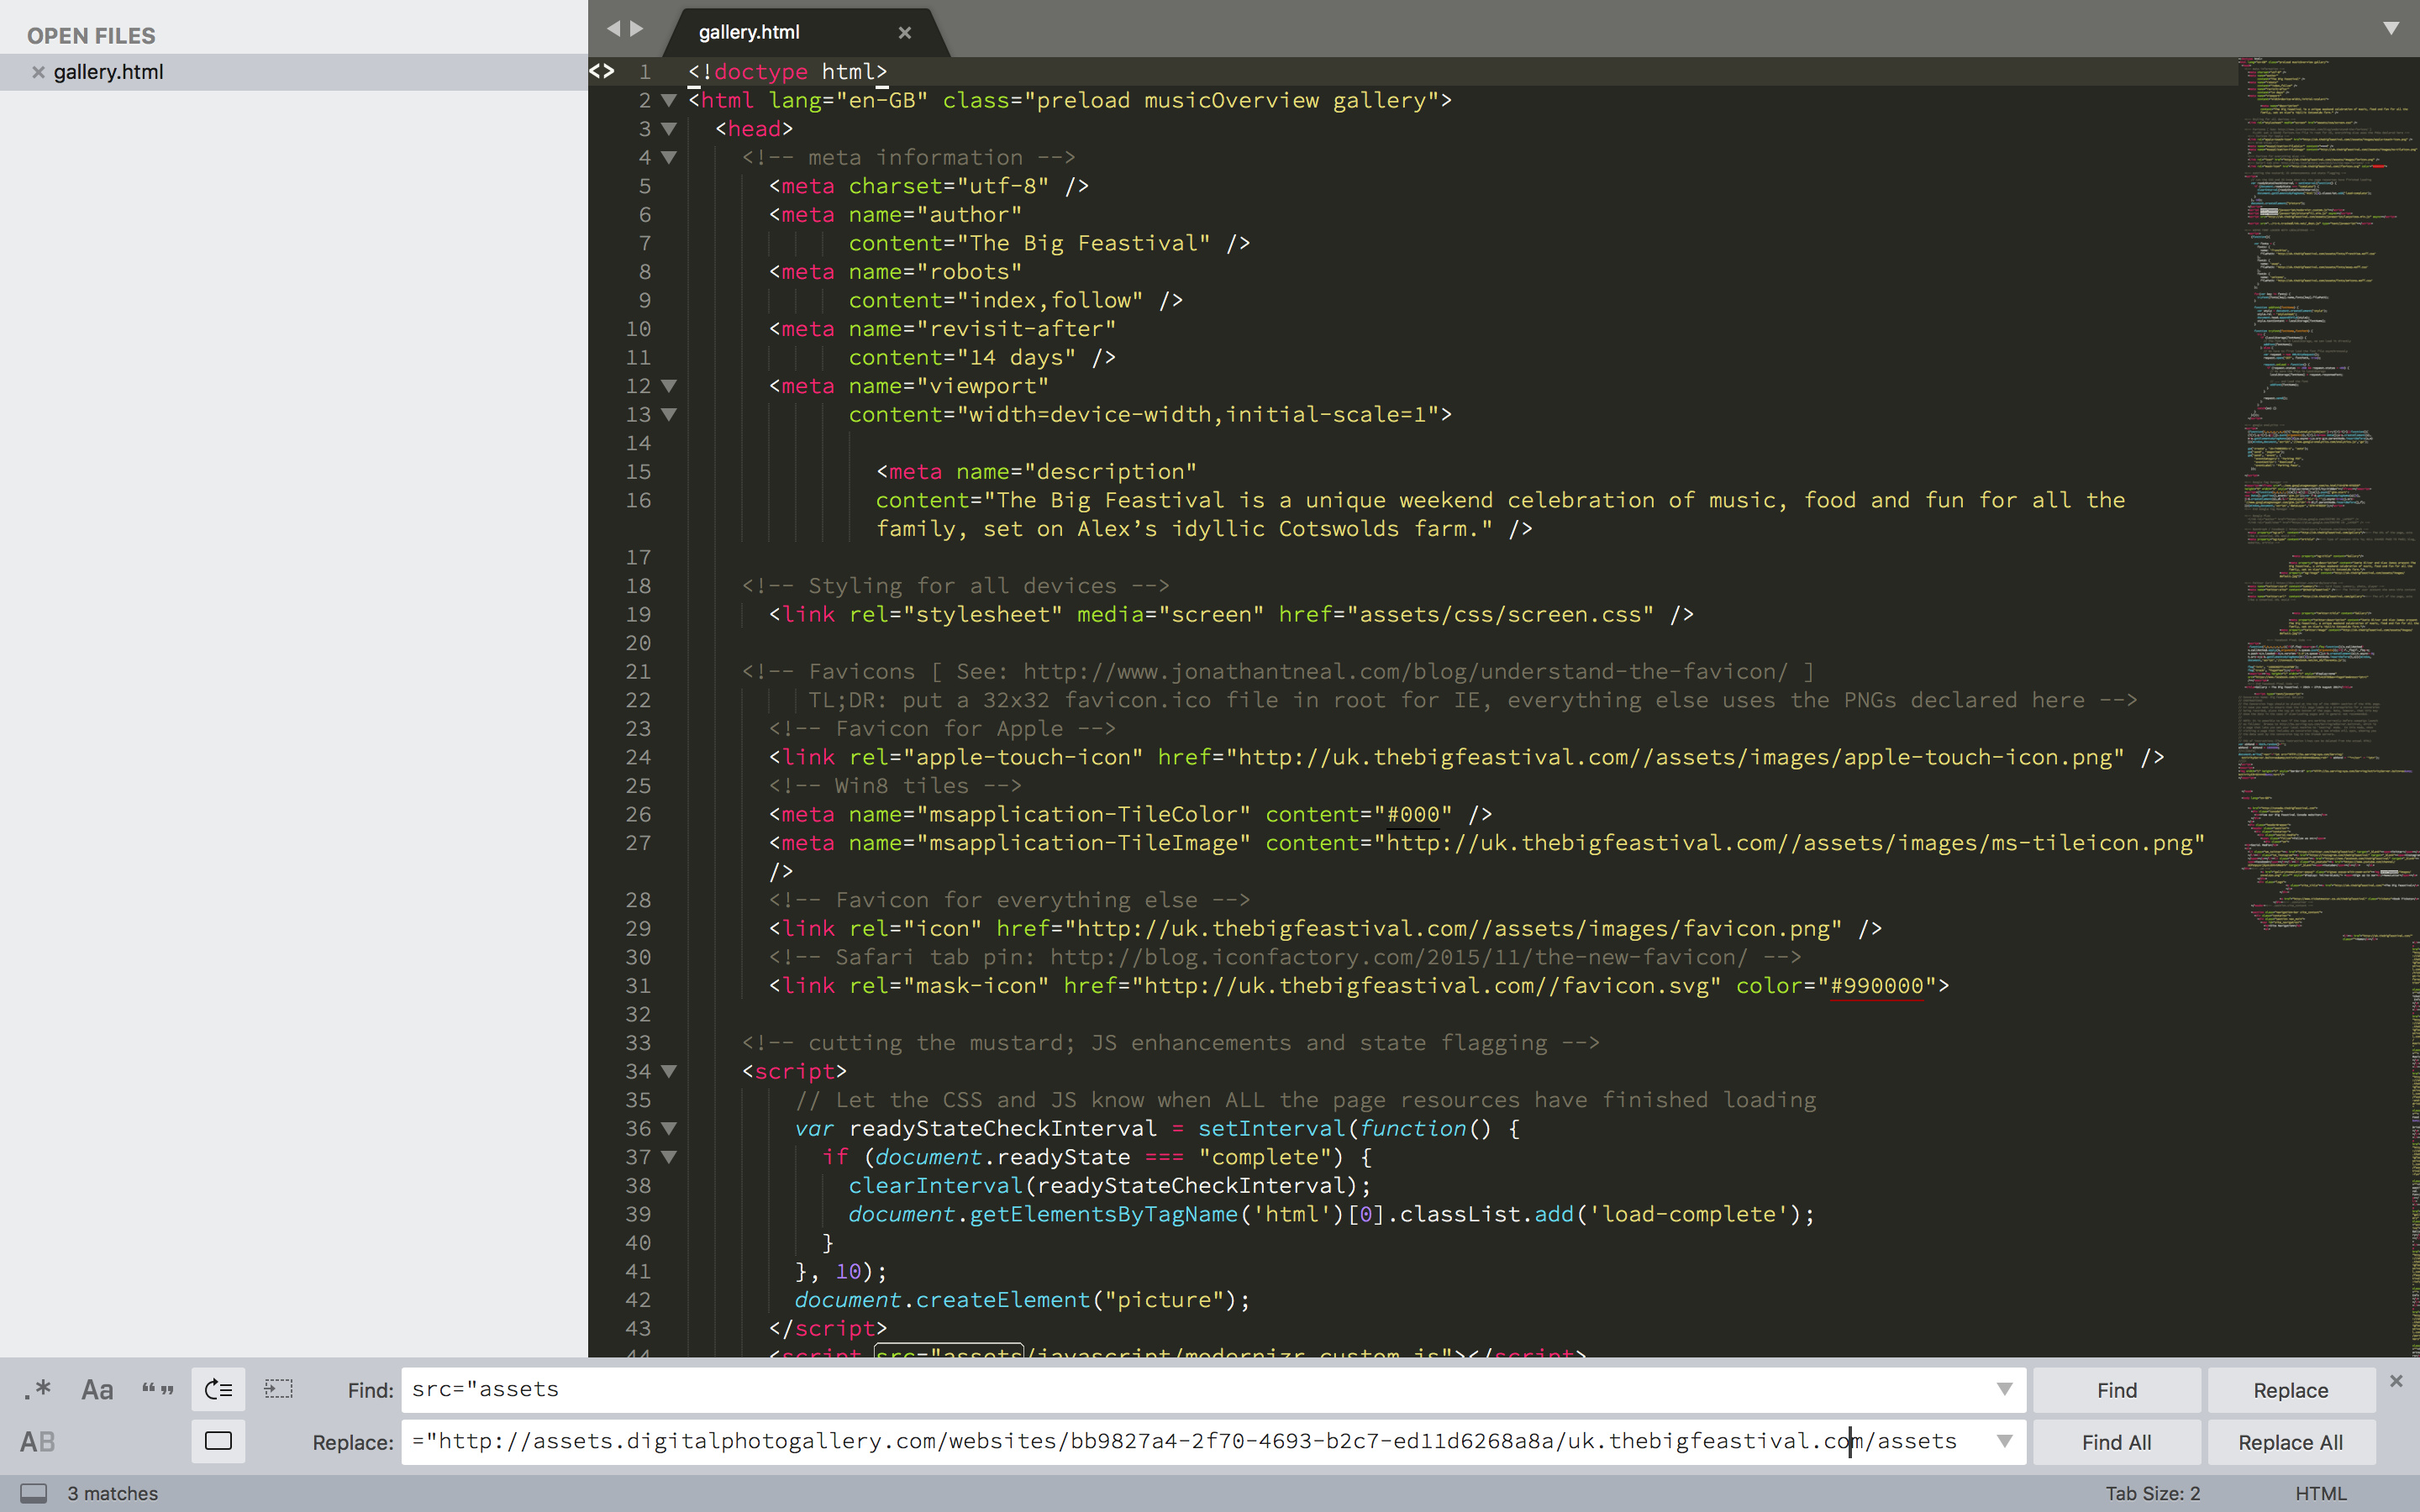
When you ran the wget command it will have downloaded the HTML of the page that you targeted. Locate that file on your local disk and in the code find and replace any linked assets with their new address. Test the local page periodically in a browser to check your progress.
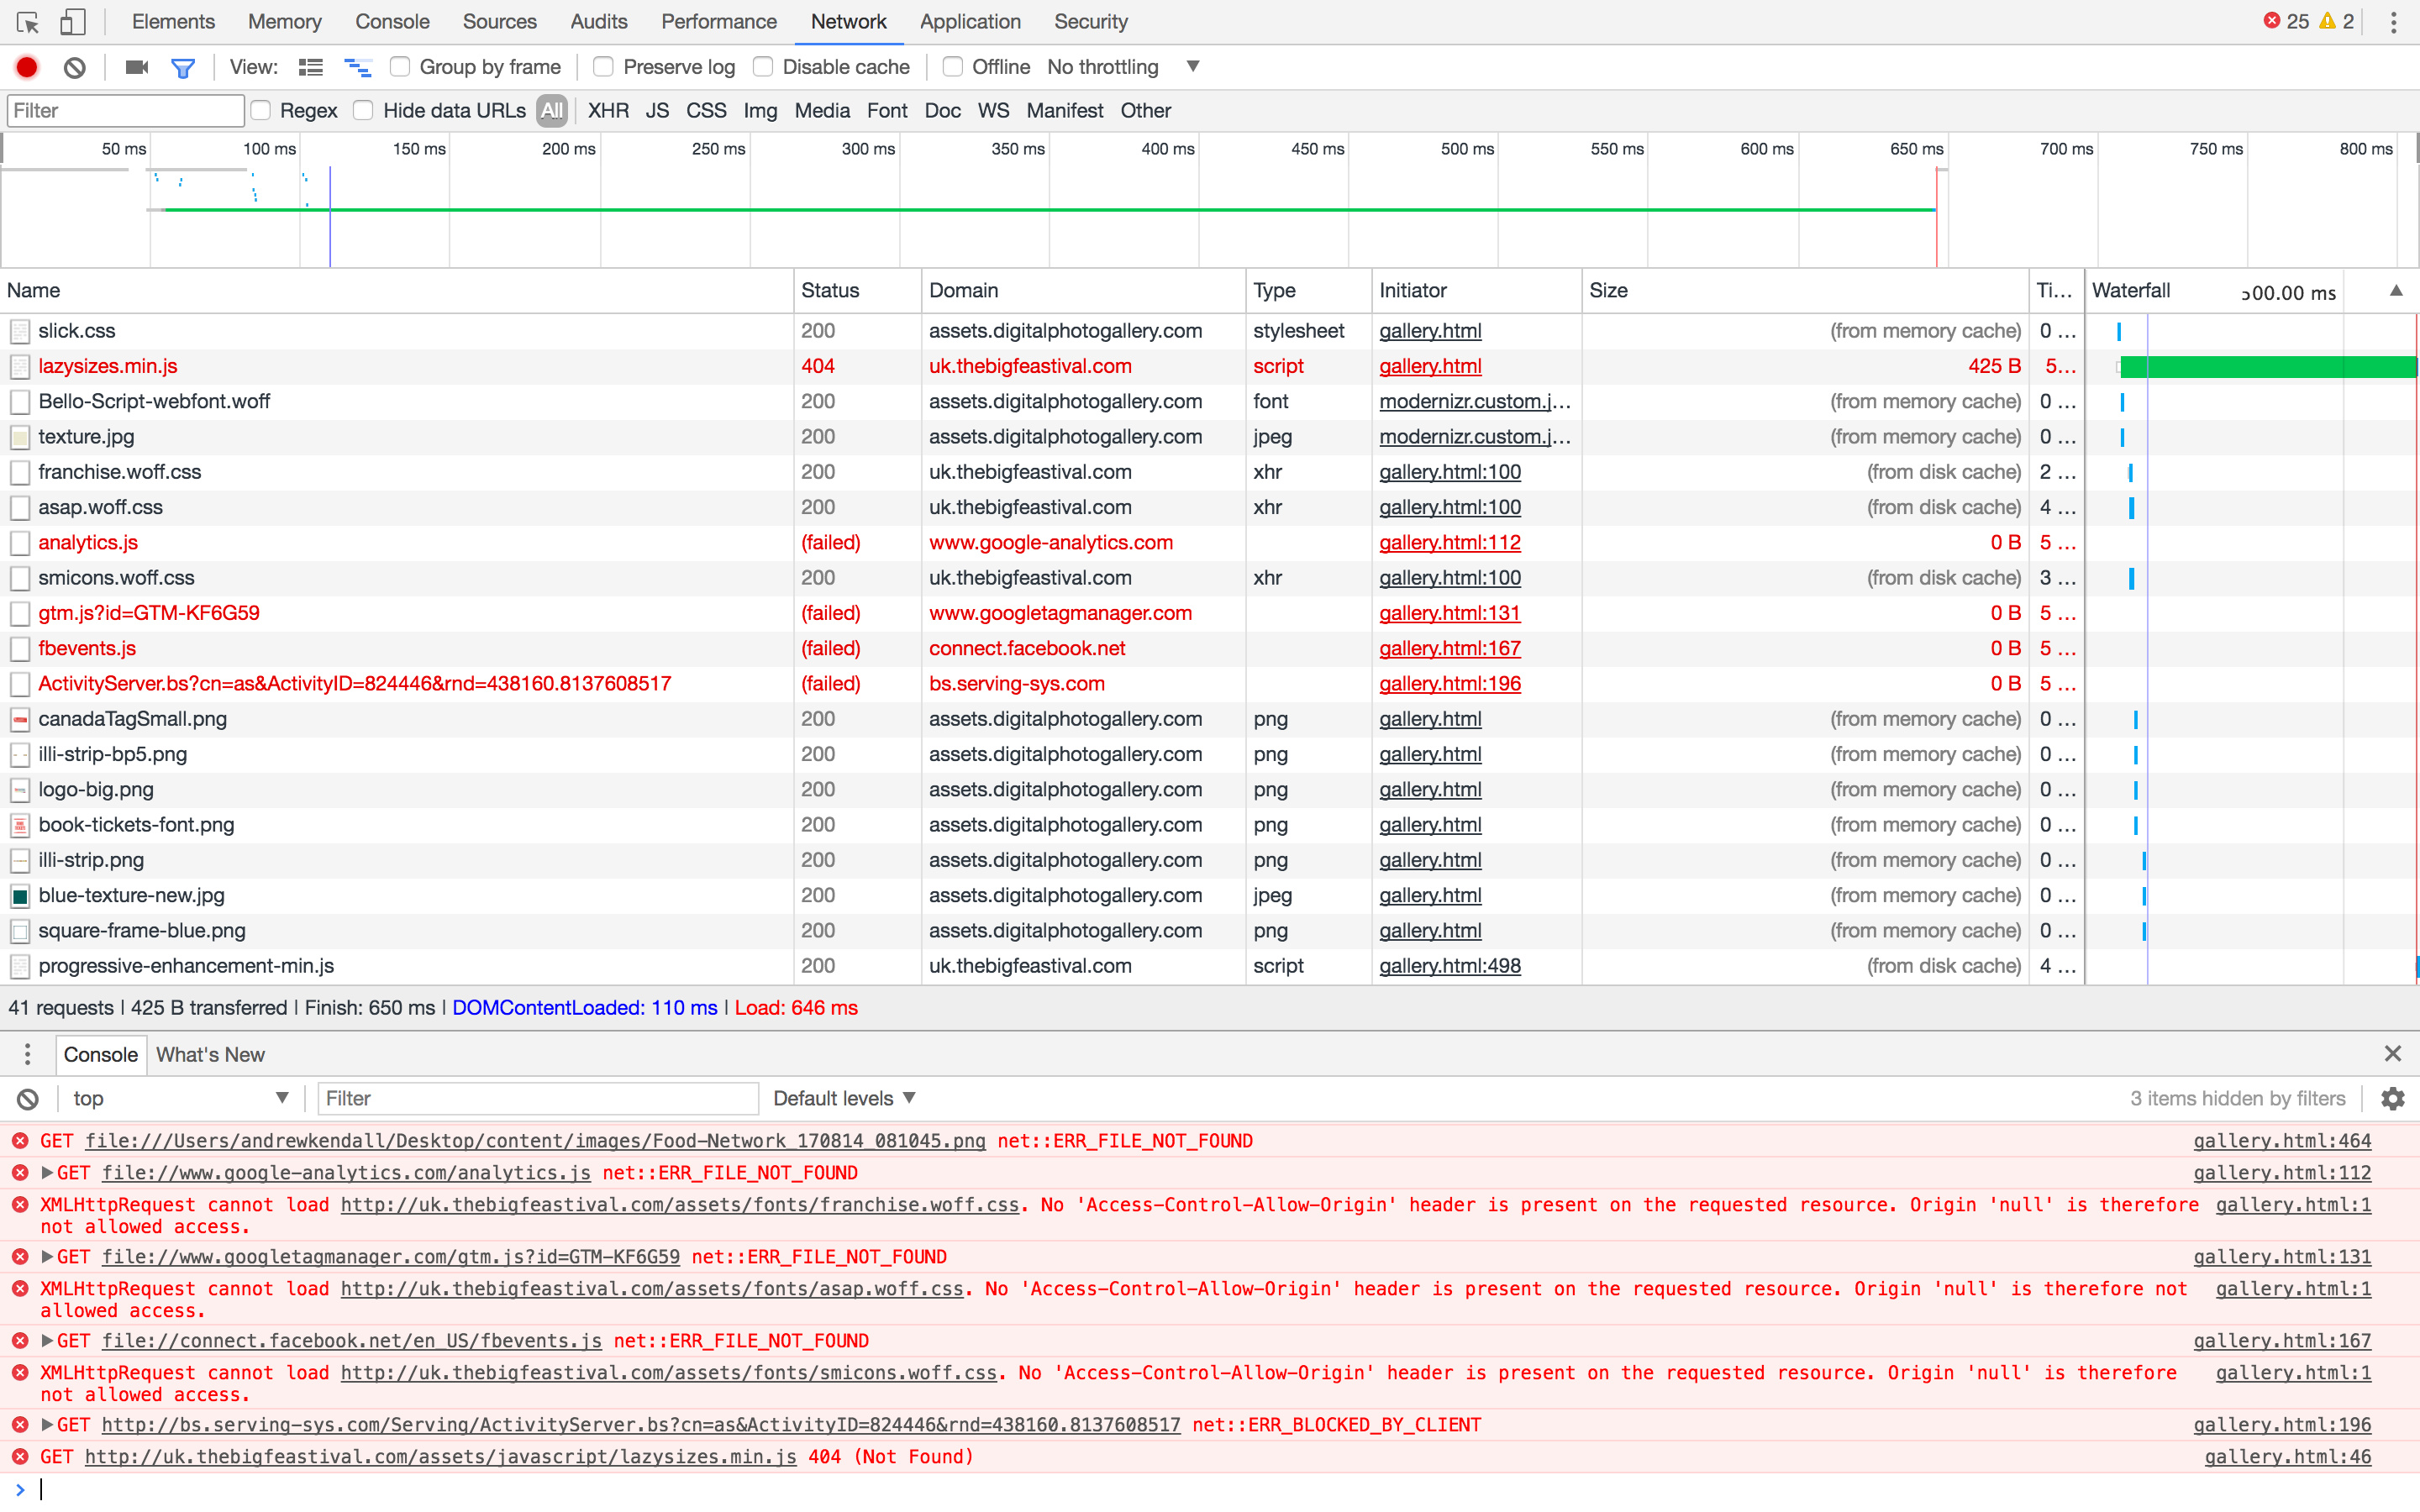
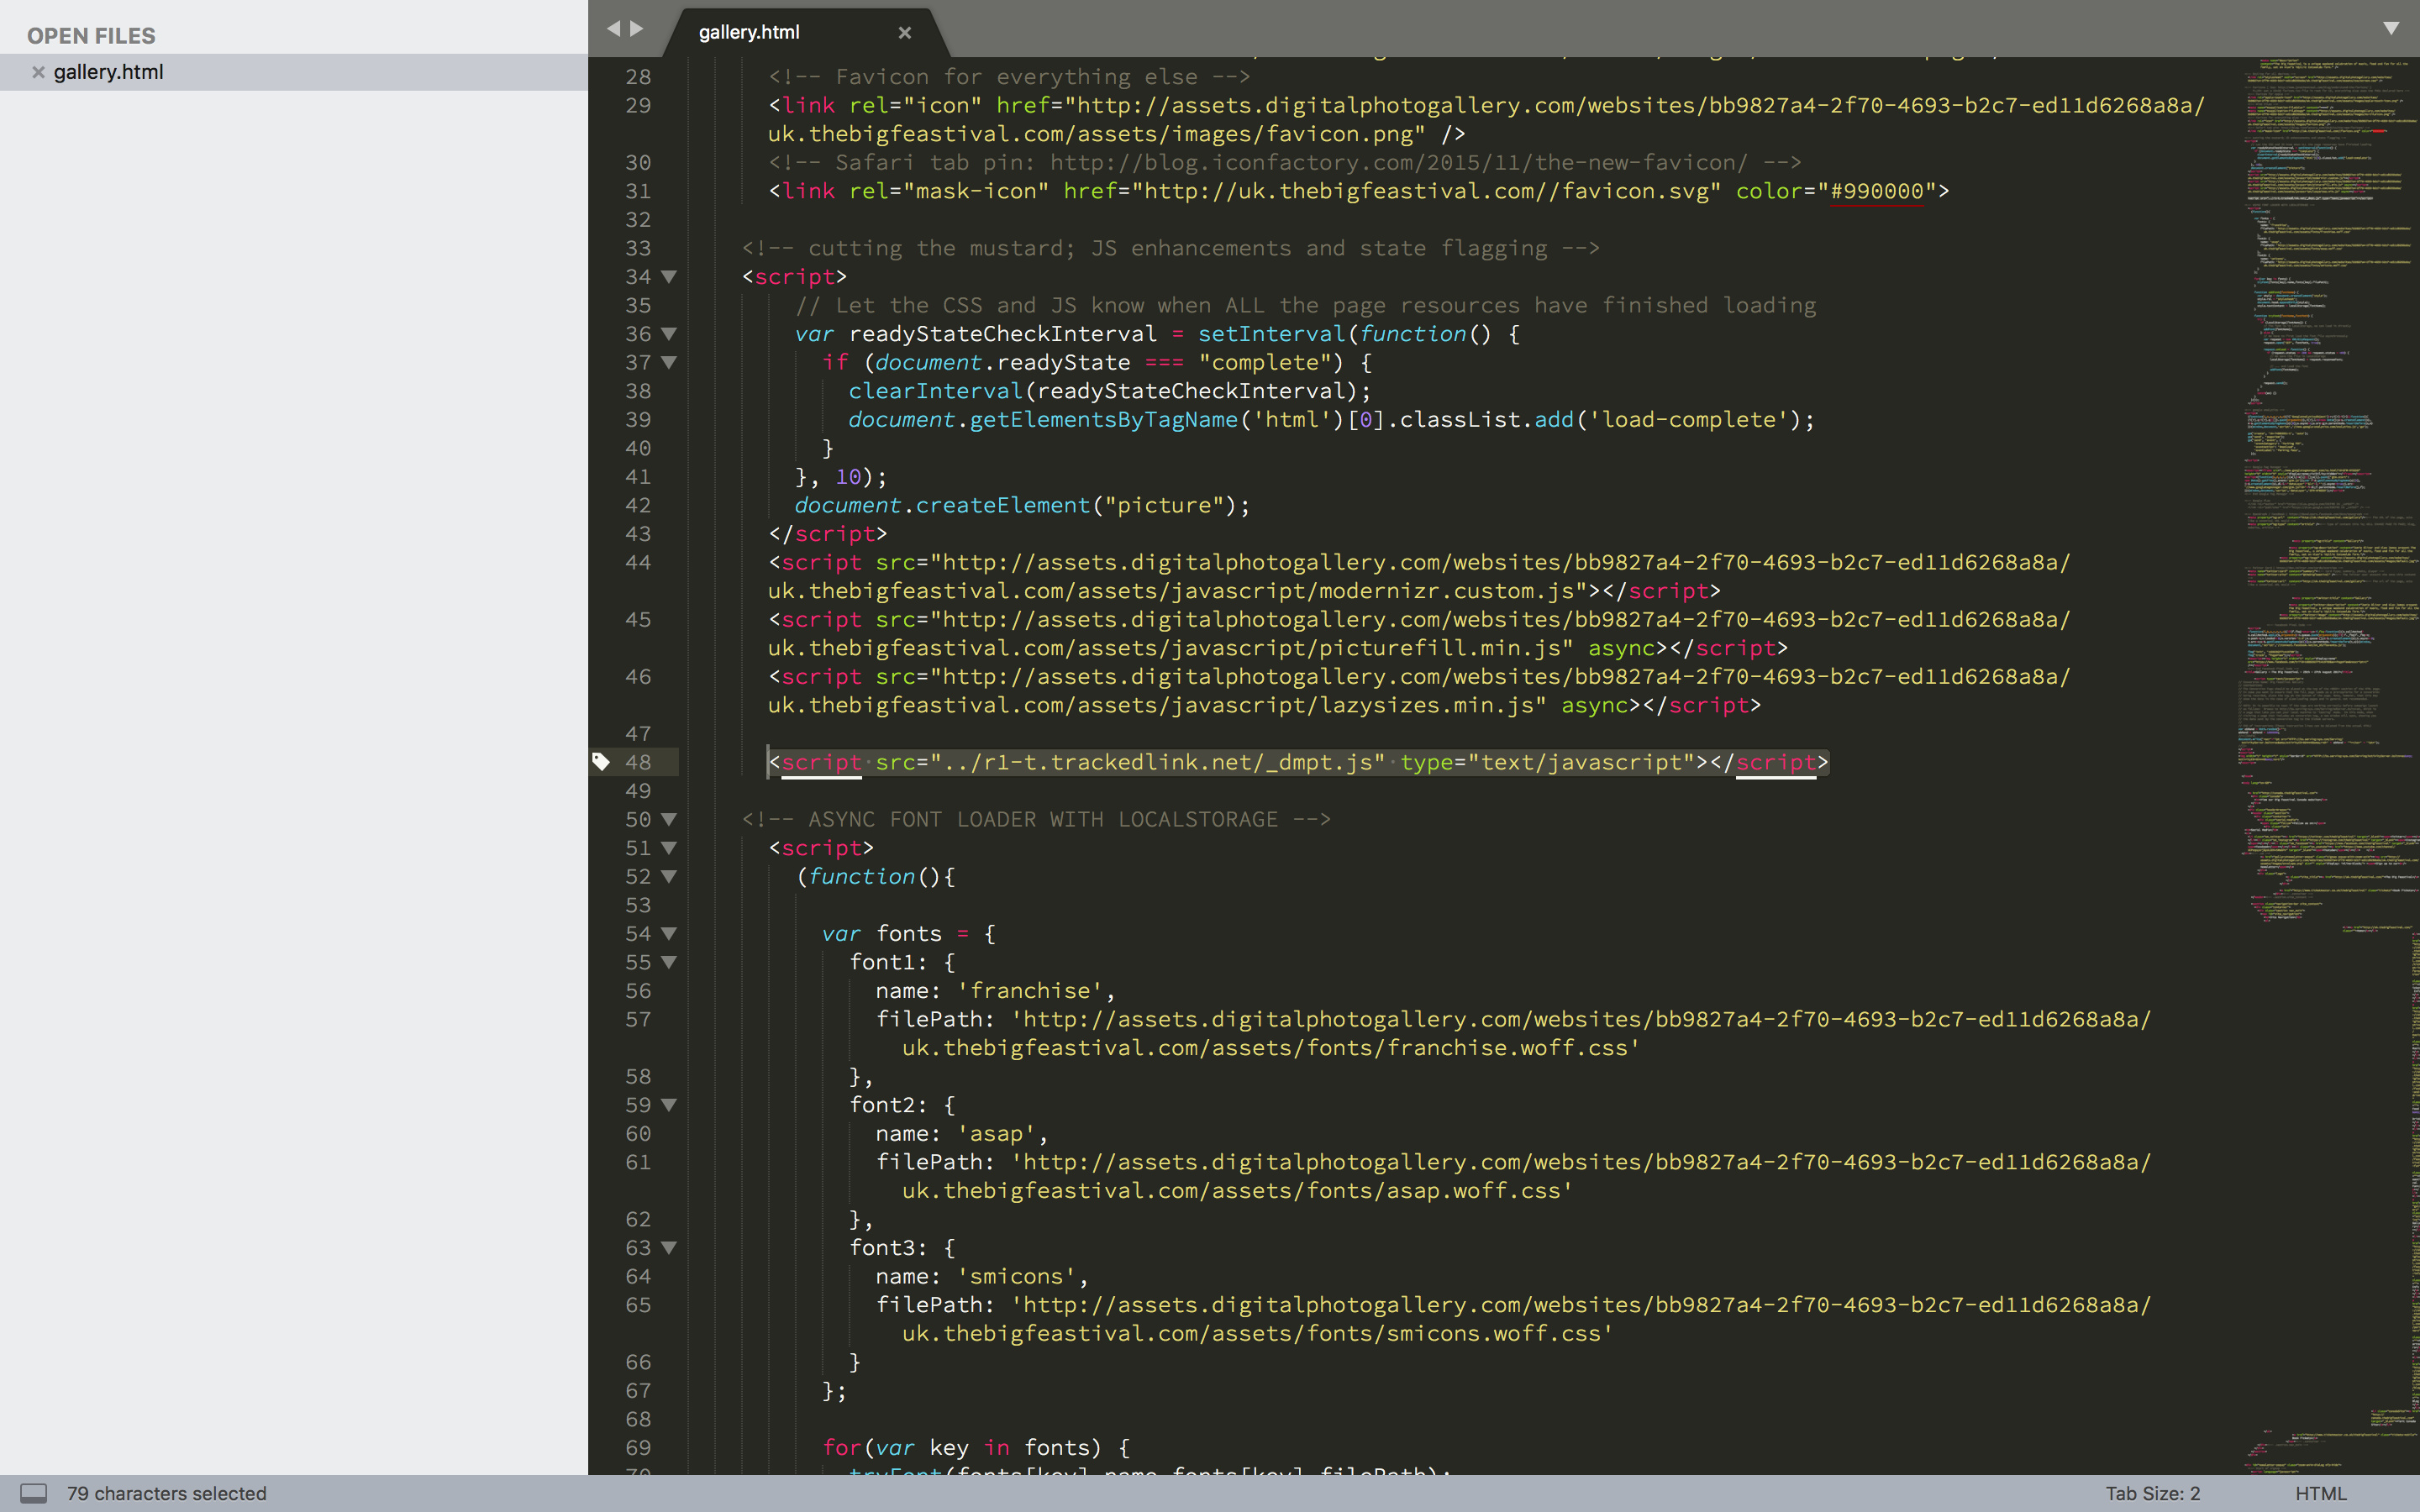
While you are re-linking assets you may also want to remove any unused tracking code.

Once there are no more errors check the domain that assets are coming from to make sure no assets are being served from an address you don't have control of.
Example file at this stage.
Learn about DPG page layouts
View this article to learn how to get the current DPG insert code and find out how to apply your HTML code to your DPG gallery.
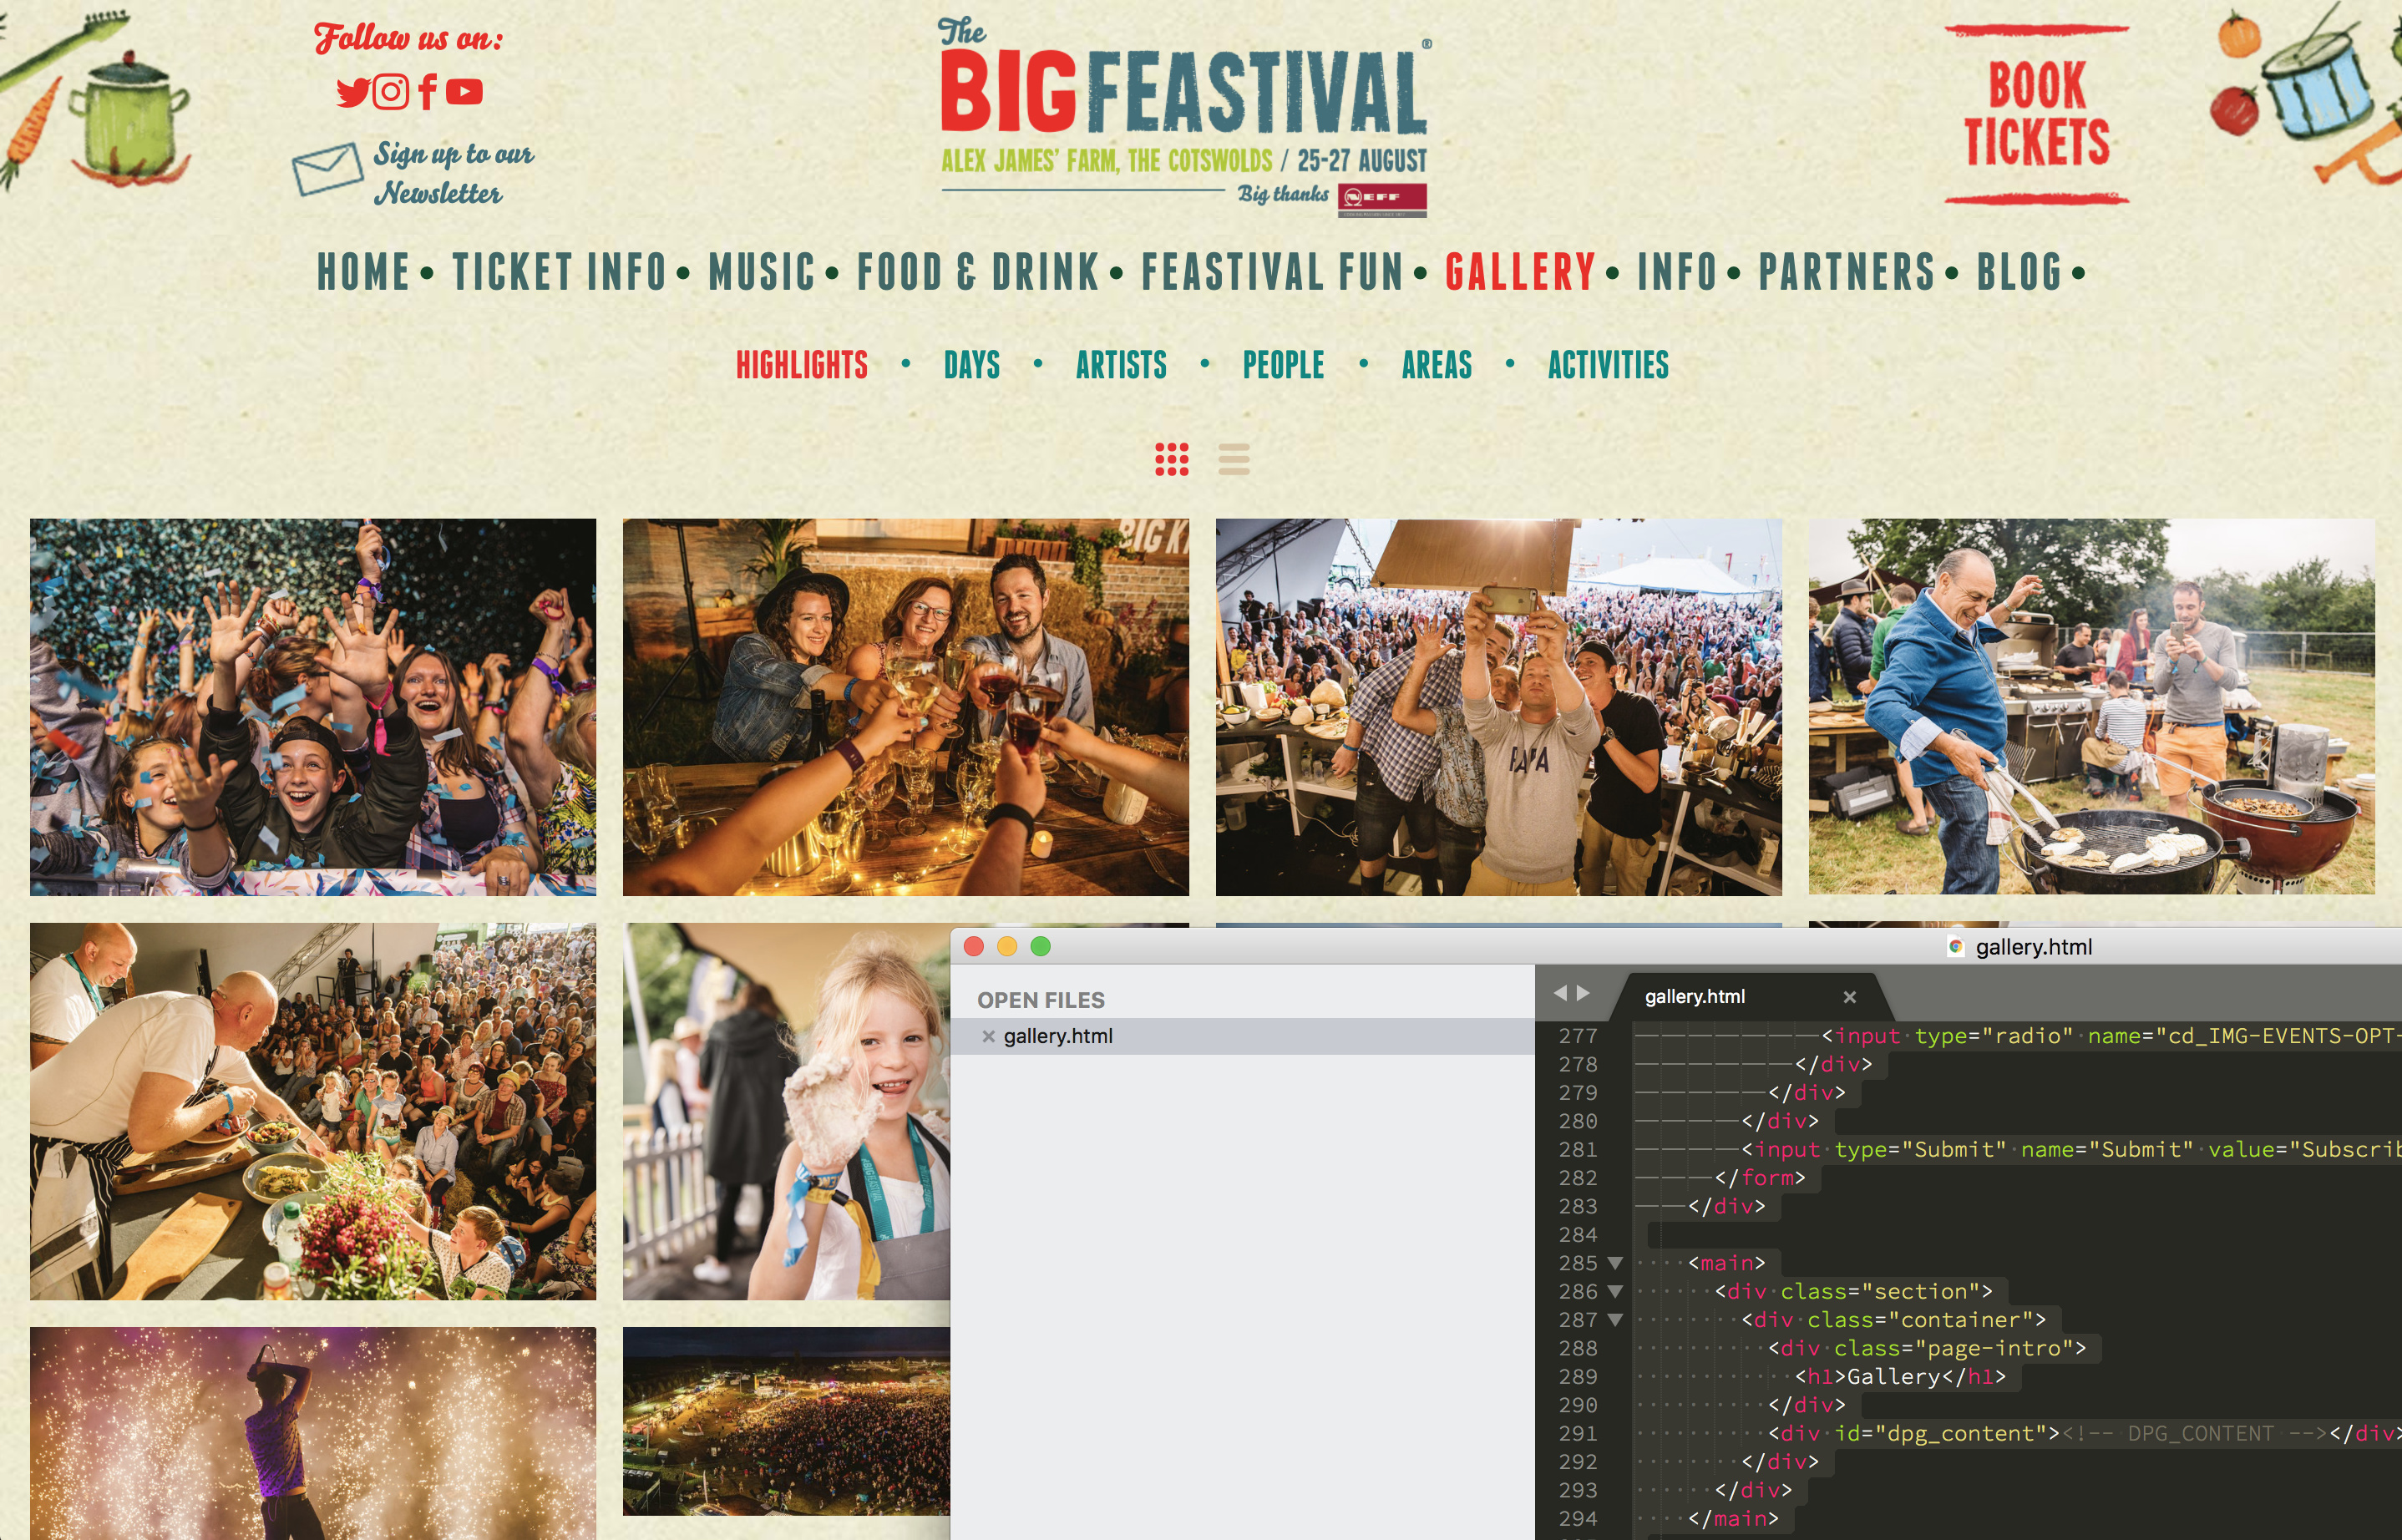
Convert the downloaded HTML into a skin
Now that you have a perfect copy of the original page you can start editing it to add in the DPG inserts.
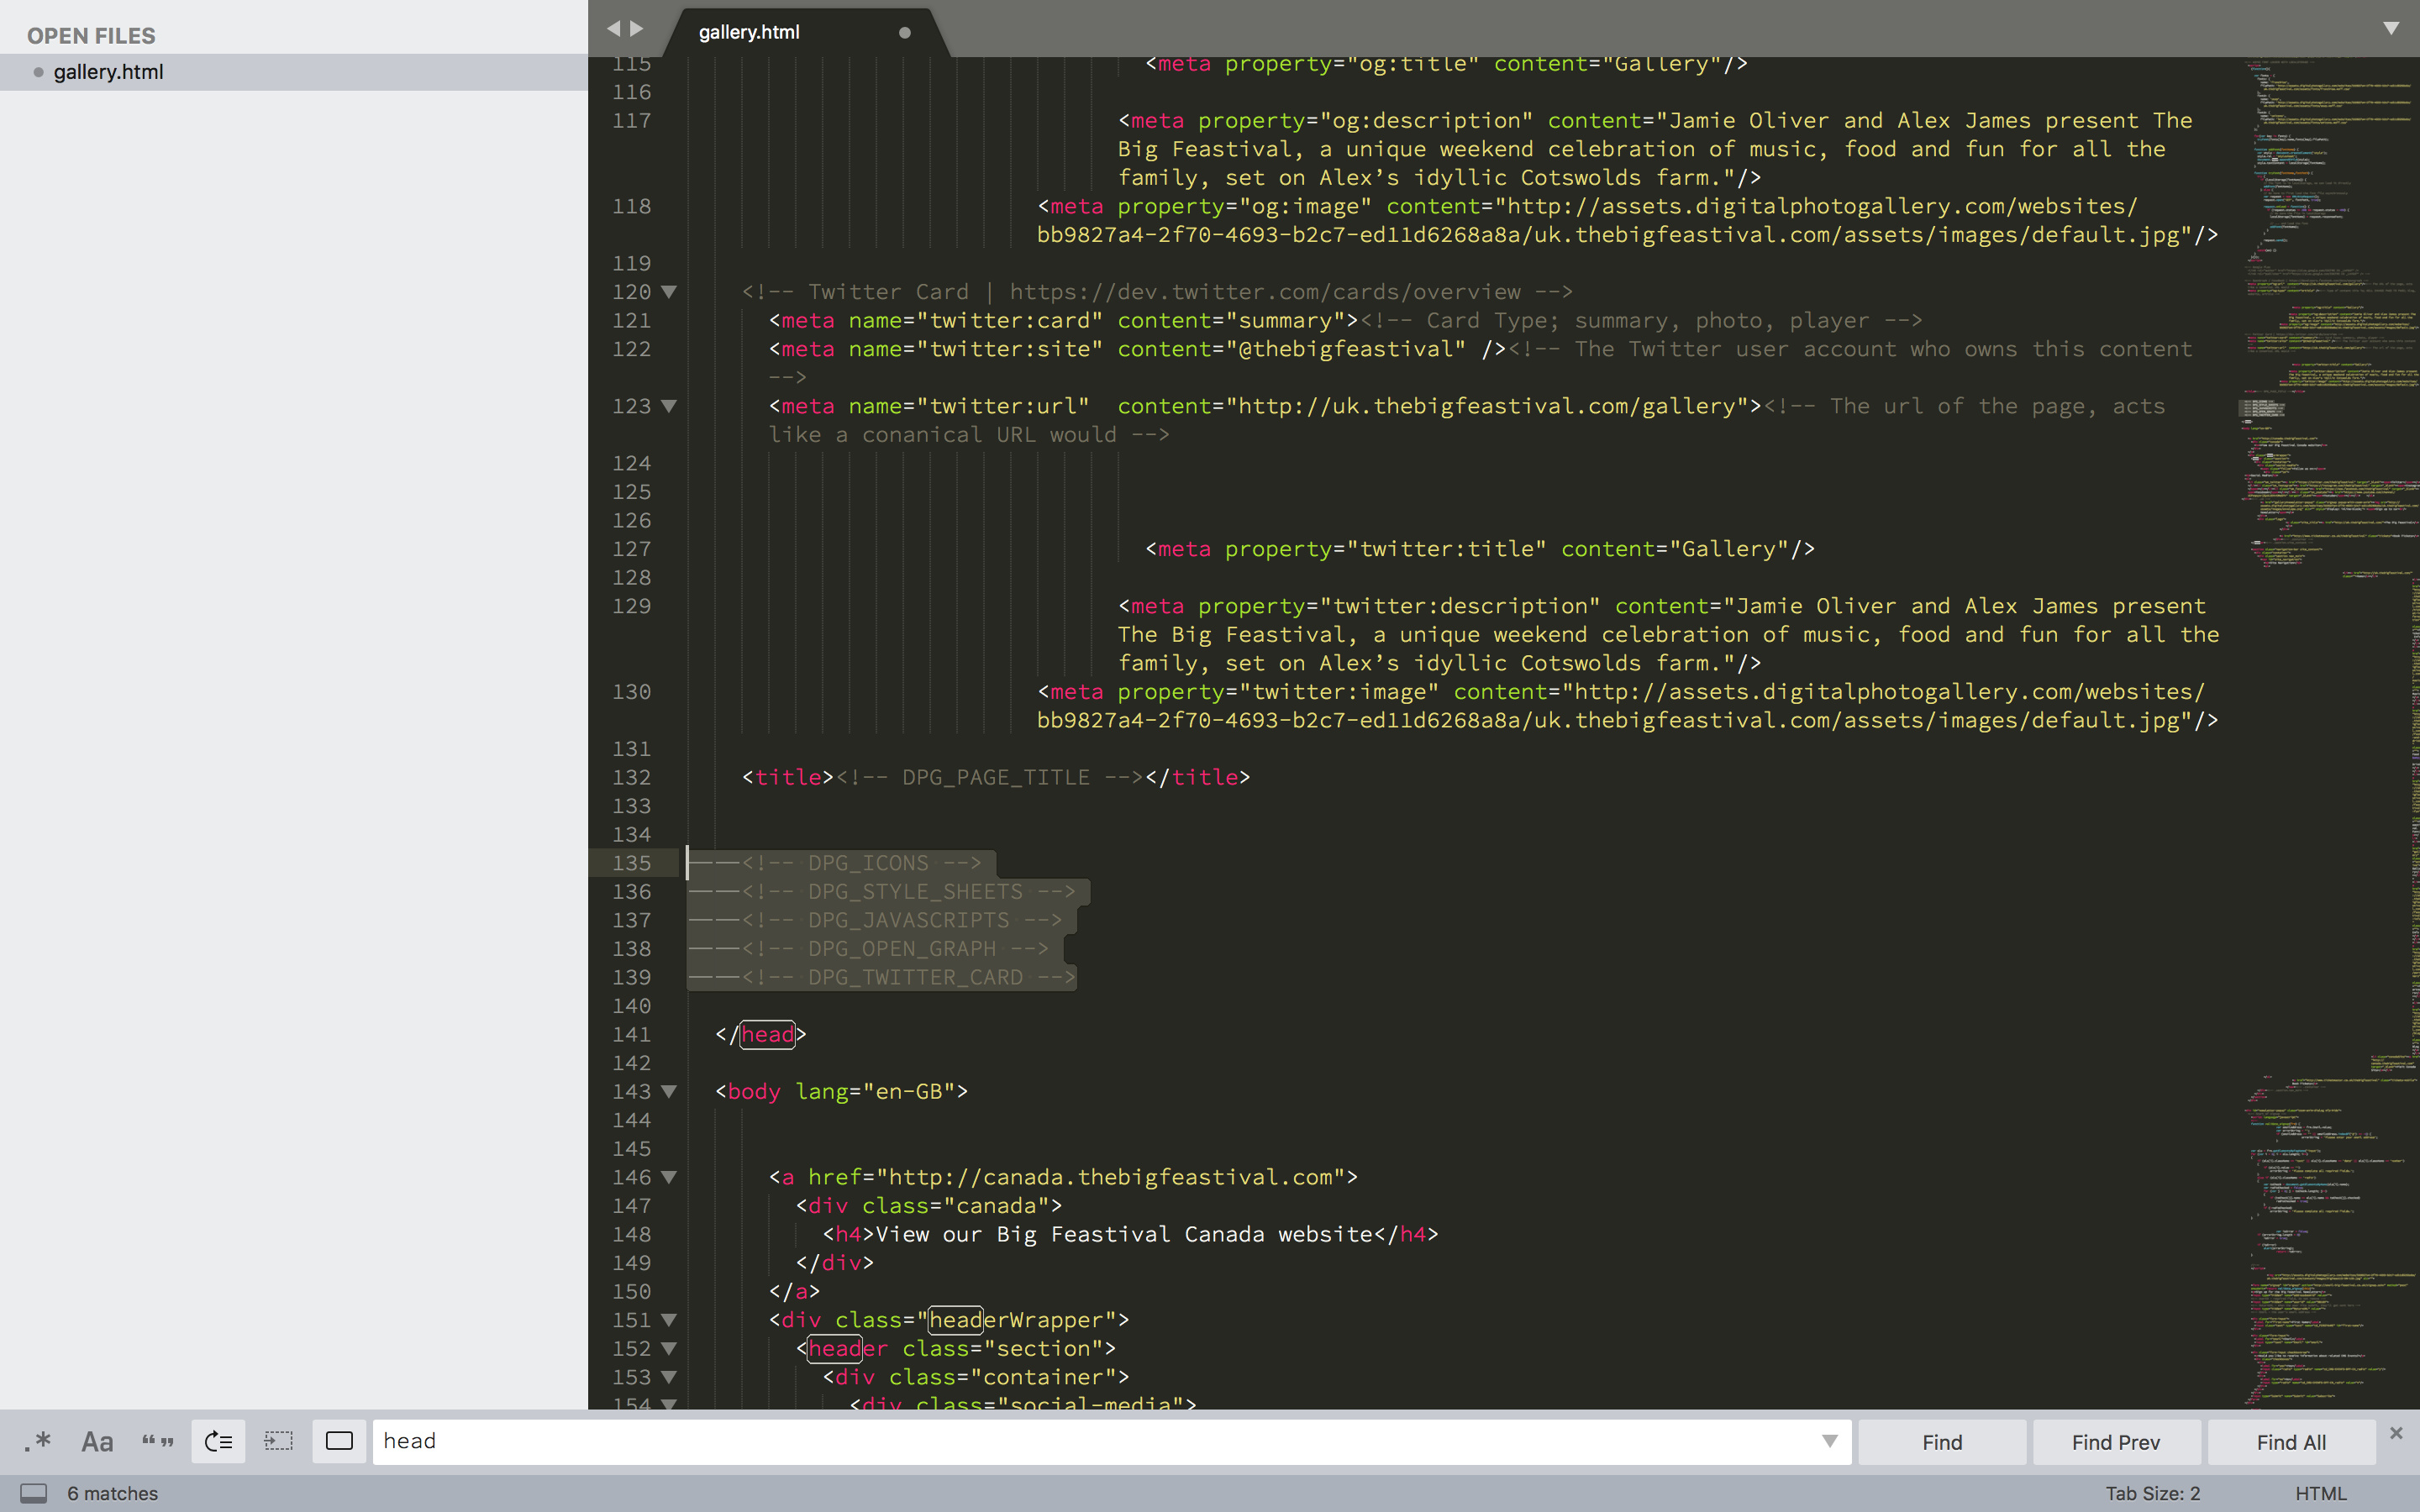
Add in the DPG inserts for header.
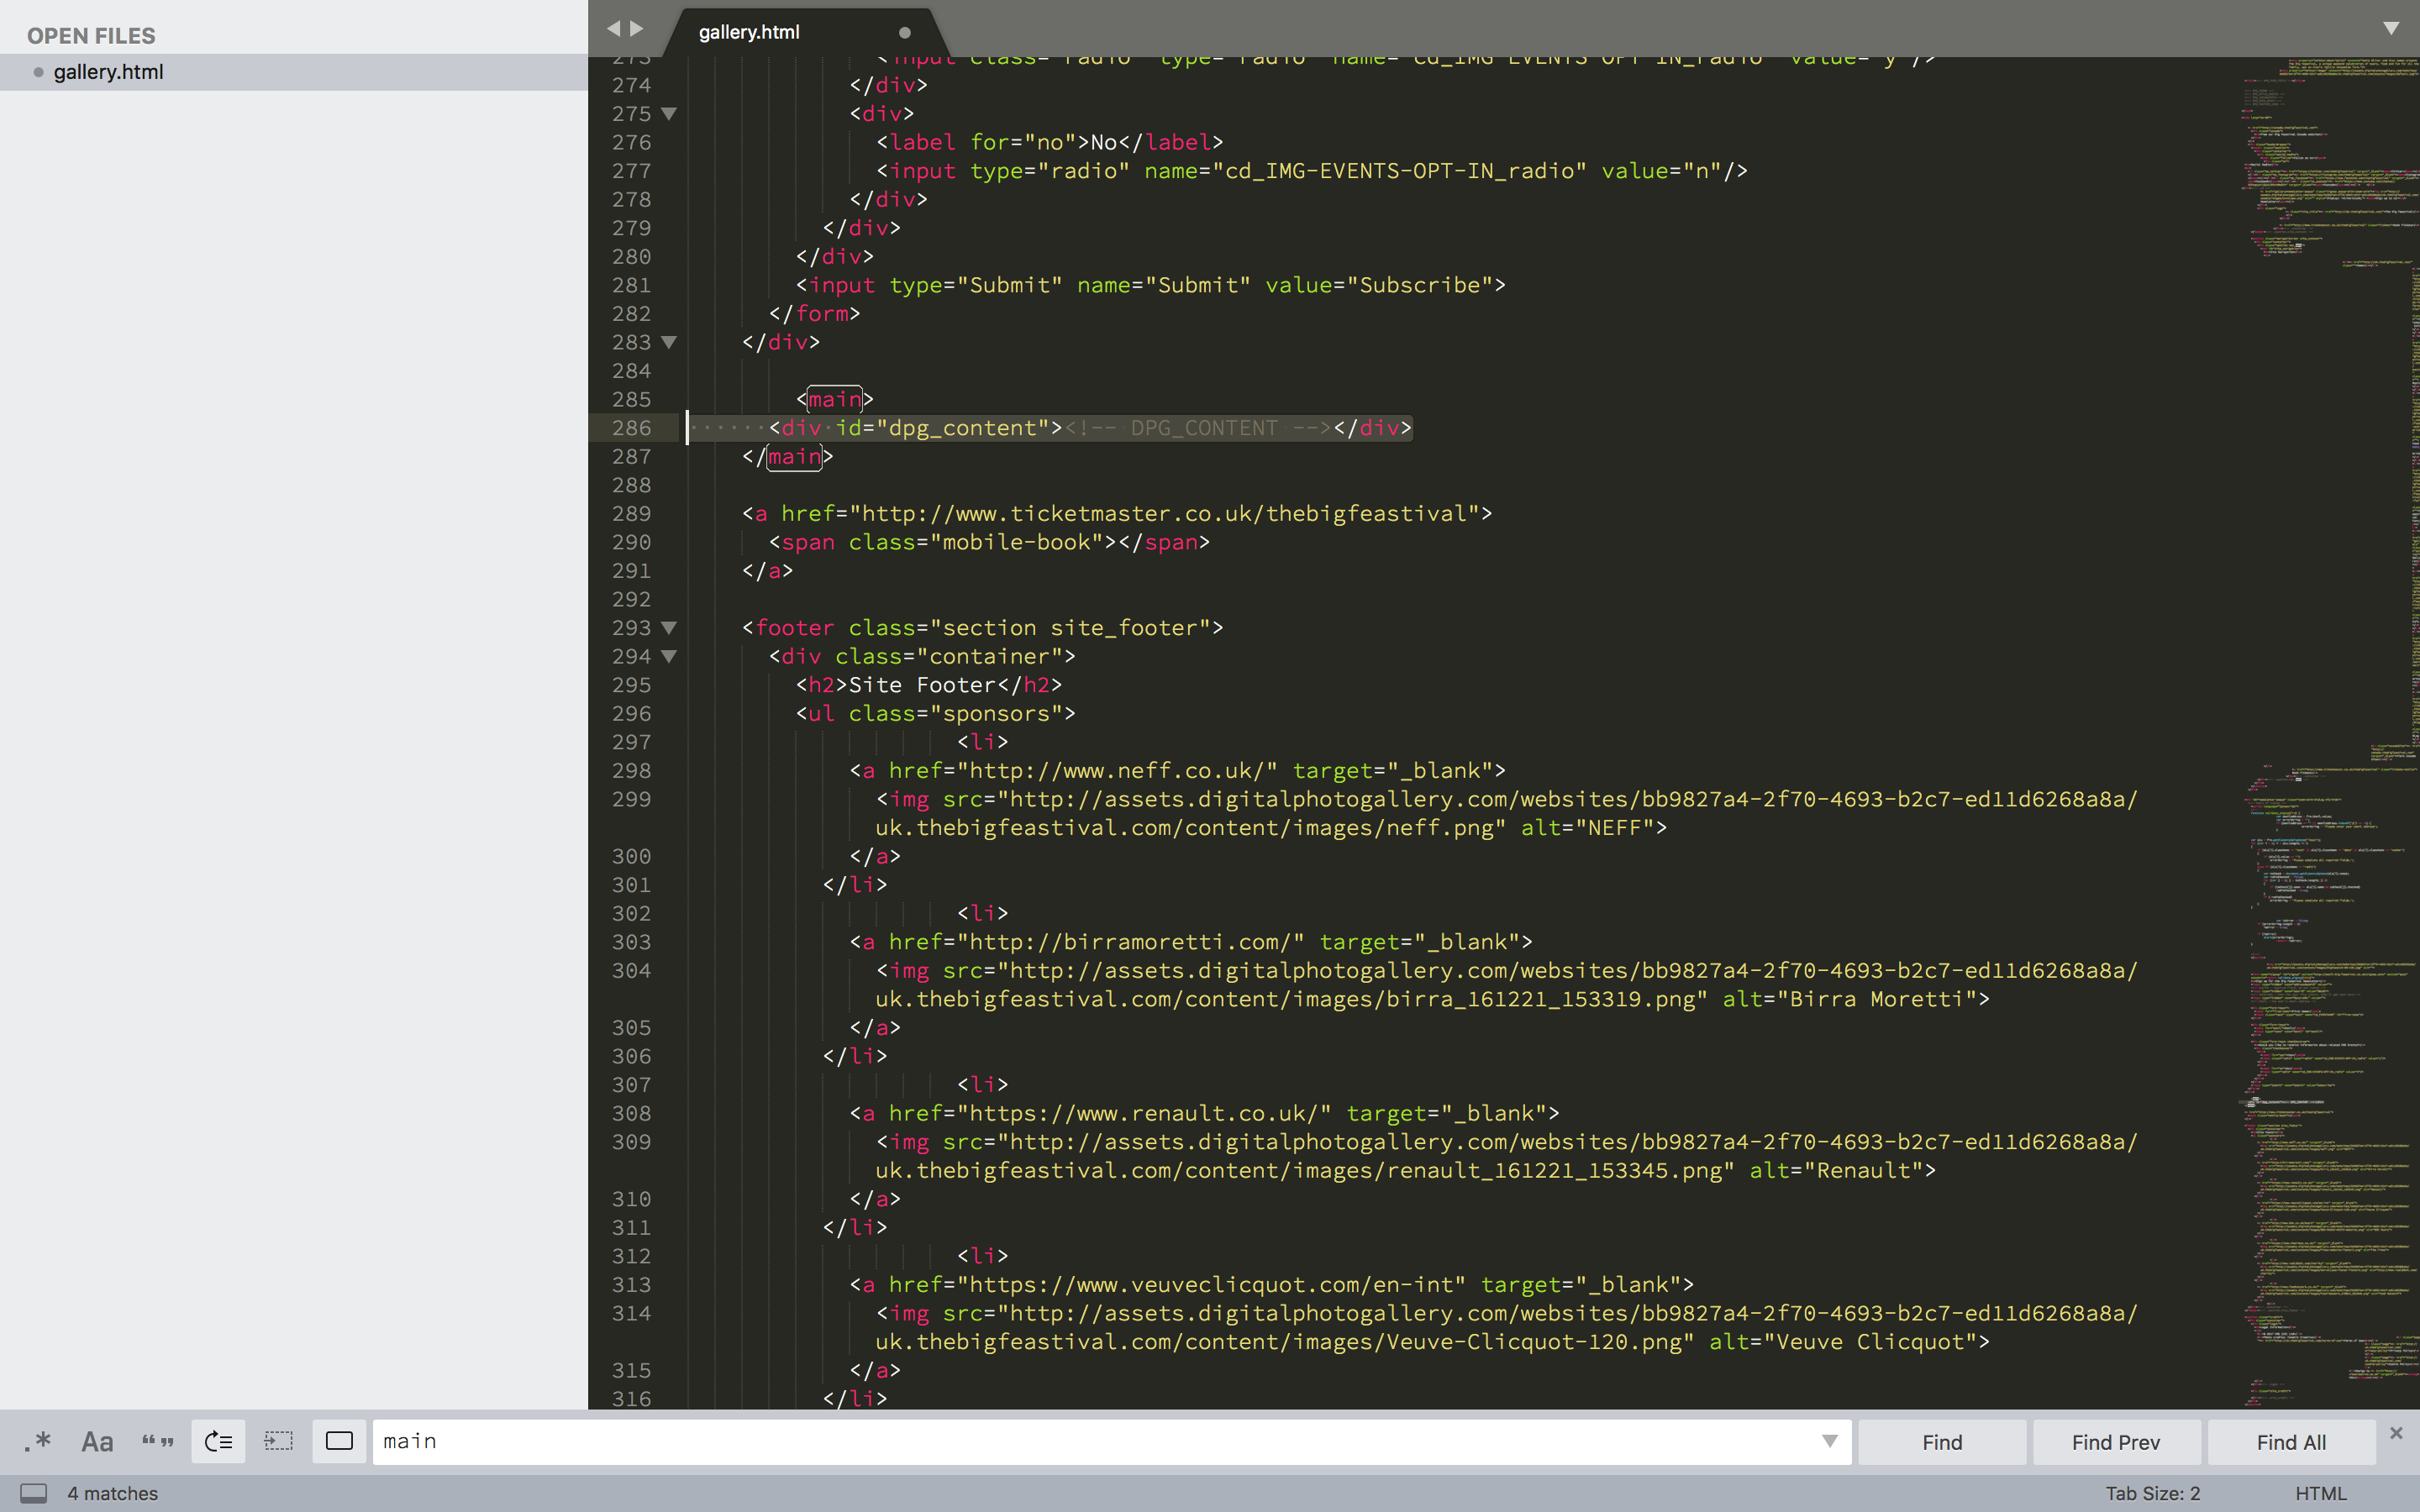
Remove the content HTML and replace with the DPG content insert.
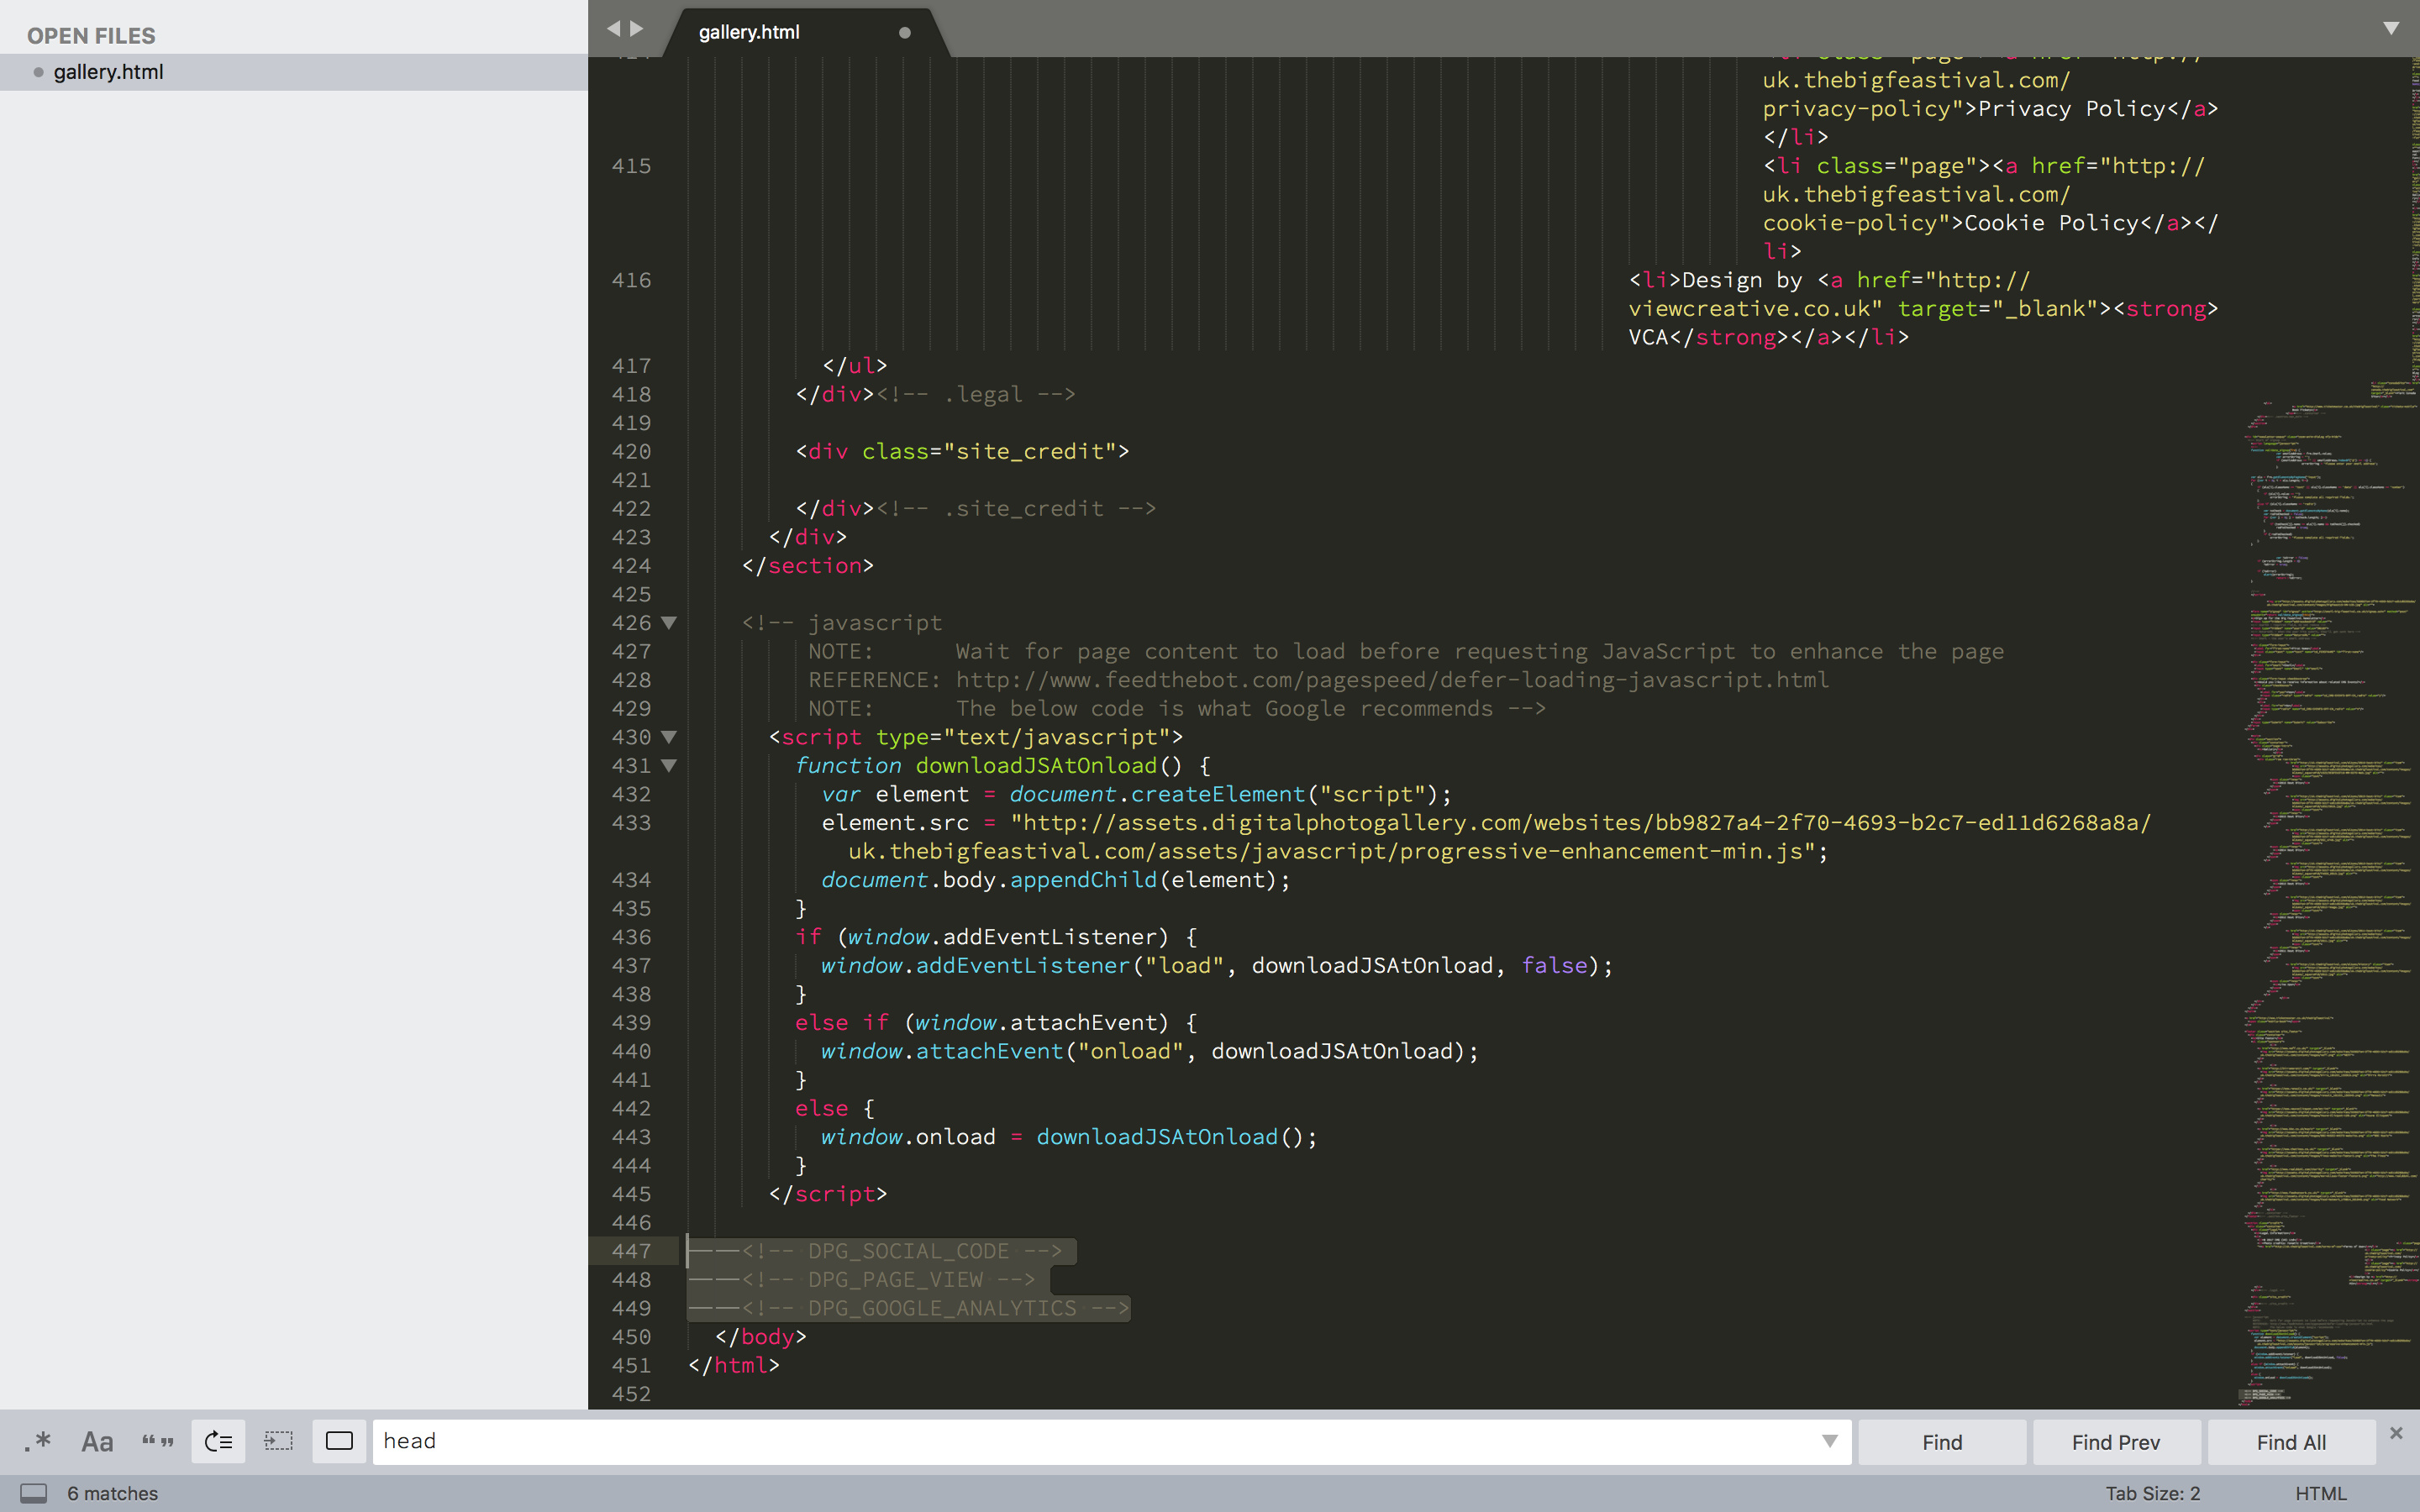
Add inserts to the end of the page.

Create your page layout in DPG.
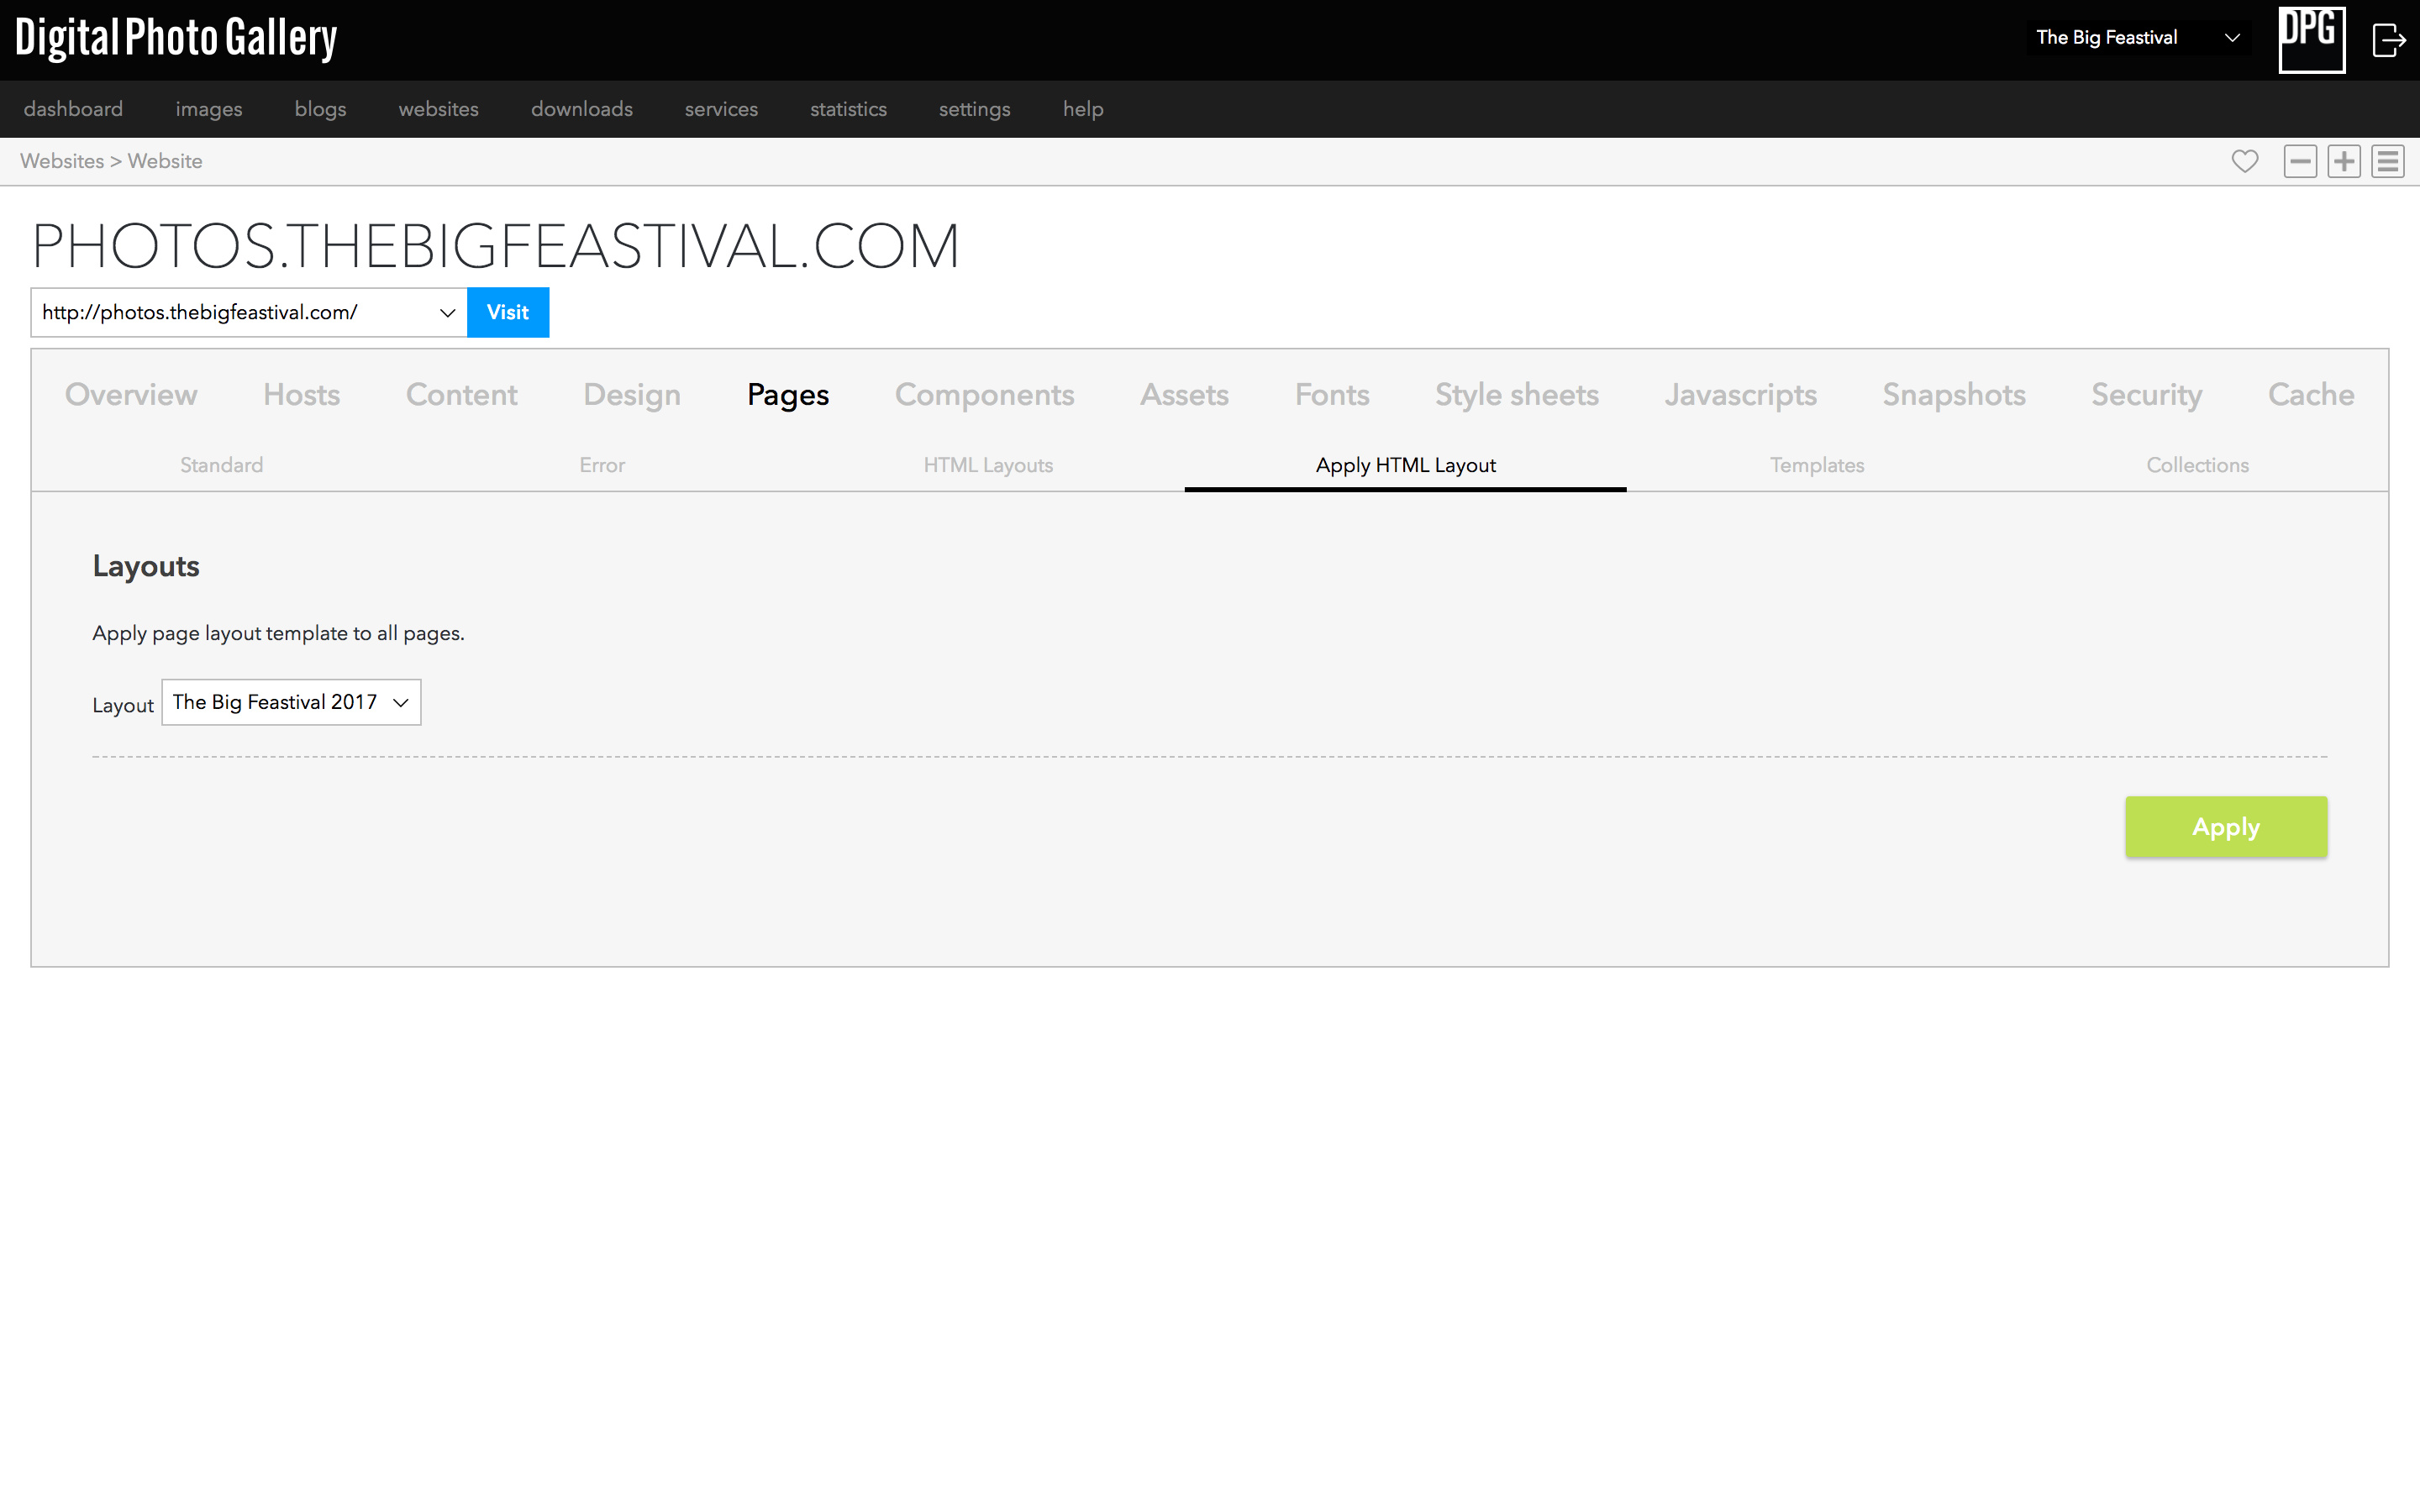
Test your layout on a single page. Once you know that it works correctly, apply it to all pages.

You now have a full working DPG site which matches your main website. Finally, add any links from your main site to point to the new photo gallery.
Finished code from this example.