The new site may take a few minutes to build. Please be patient and stay on the screen while it does.
Guides - Creating a secure client area

In this guide we are going to show how to create a login-secured website from which you can distribute your work to clients. How many times have you had an urgent email from a client requesting images that you sent them months or even years ago? With the secure client area we aim to solve that, by having one place where clients know they can always download your work.
All downloads from the client area will be uniquely encoded so that they can be traced back to the user that downloaded them.
You can see a live demo of a client area here.
Create the site
Visit the websites screen, click on the New site tab and follow these steps:
- Scroll to the Modern Narrative template.
- Choose the page collection Client Delivery Site [Switchable].
- Select an initial theme for the template (this can be changed later).
- Click Create.
- Enter a name for your website, this can be anything you like and can also be changed later on.
- Click OK.
Wait for the site to be created
Set up default text
Once the site has been created you can replace the default text with your own information.
Create a set for client logos
- Create a New set called logos inside the client area's Content set.
- Click into the Logos set.
- Move the Logos set to the Assets set.
We're going to use a DPG trick which will allow you to assign the logo of each client to their specific set. We create the set inside Content so images will have all the needed image profiles and then we move it to Assets so it's only visible to you.
Upload logos

You can find most logos using a Google search. You should upload the logos as squares to avoid them being cropped in the sets view. Make sure to give the image a title so it's easy to find in the next step.
Creating sets for each client
- For each client that you work with create a set inside the Content set.
- Click into the set you just created.
- Click on the icon in the Set information panel and choose the relevant logo.
It's best to lock the client set to avoid accidental deletion.
Accessing advanced options
In order to access the website security features you'll need to switch the website Edit mode to Standard using the panel on the right.
Securing the site
Now we're going to enable the security options to restrict access to the site.
- Toggle the Enable log in and User permissions switches to on.
- Turn off Sign up screen.
- Create a Restricted URL which points to / with the Authentication method set to User login.
Create a login for yourself
With the site secured you should create a login for yourself and visit it. Make sure that your user is created with the role admin so that you can see all of the sets.Adding a project
Create a set for each of your projects inside the relevant client's set.
Add users
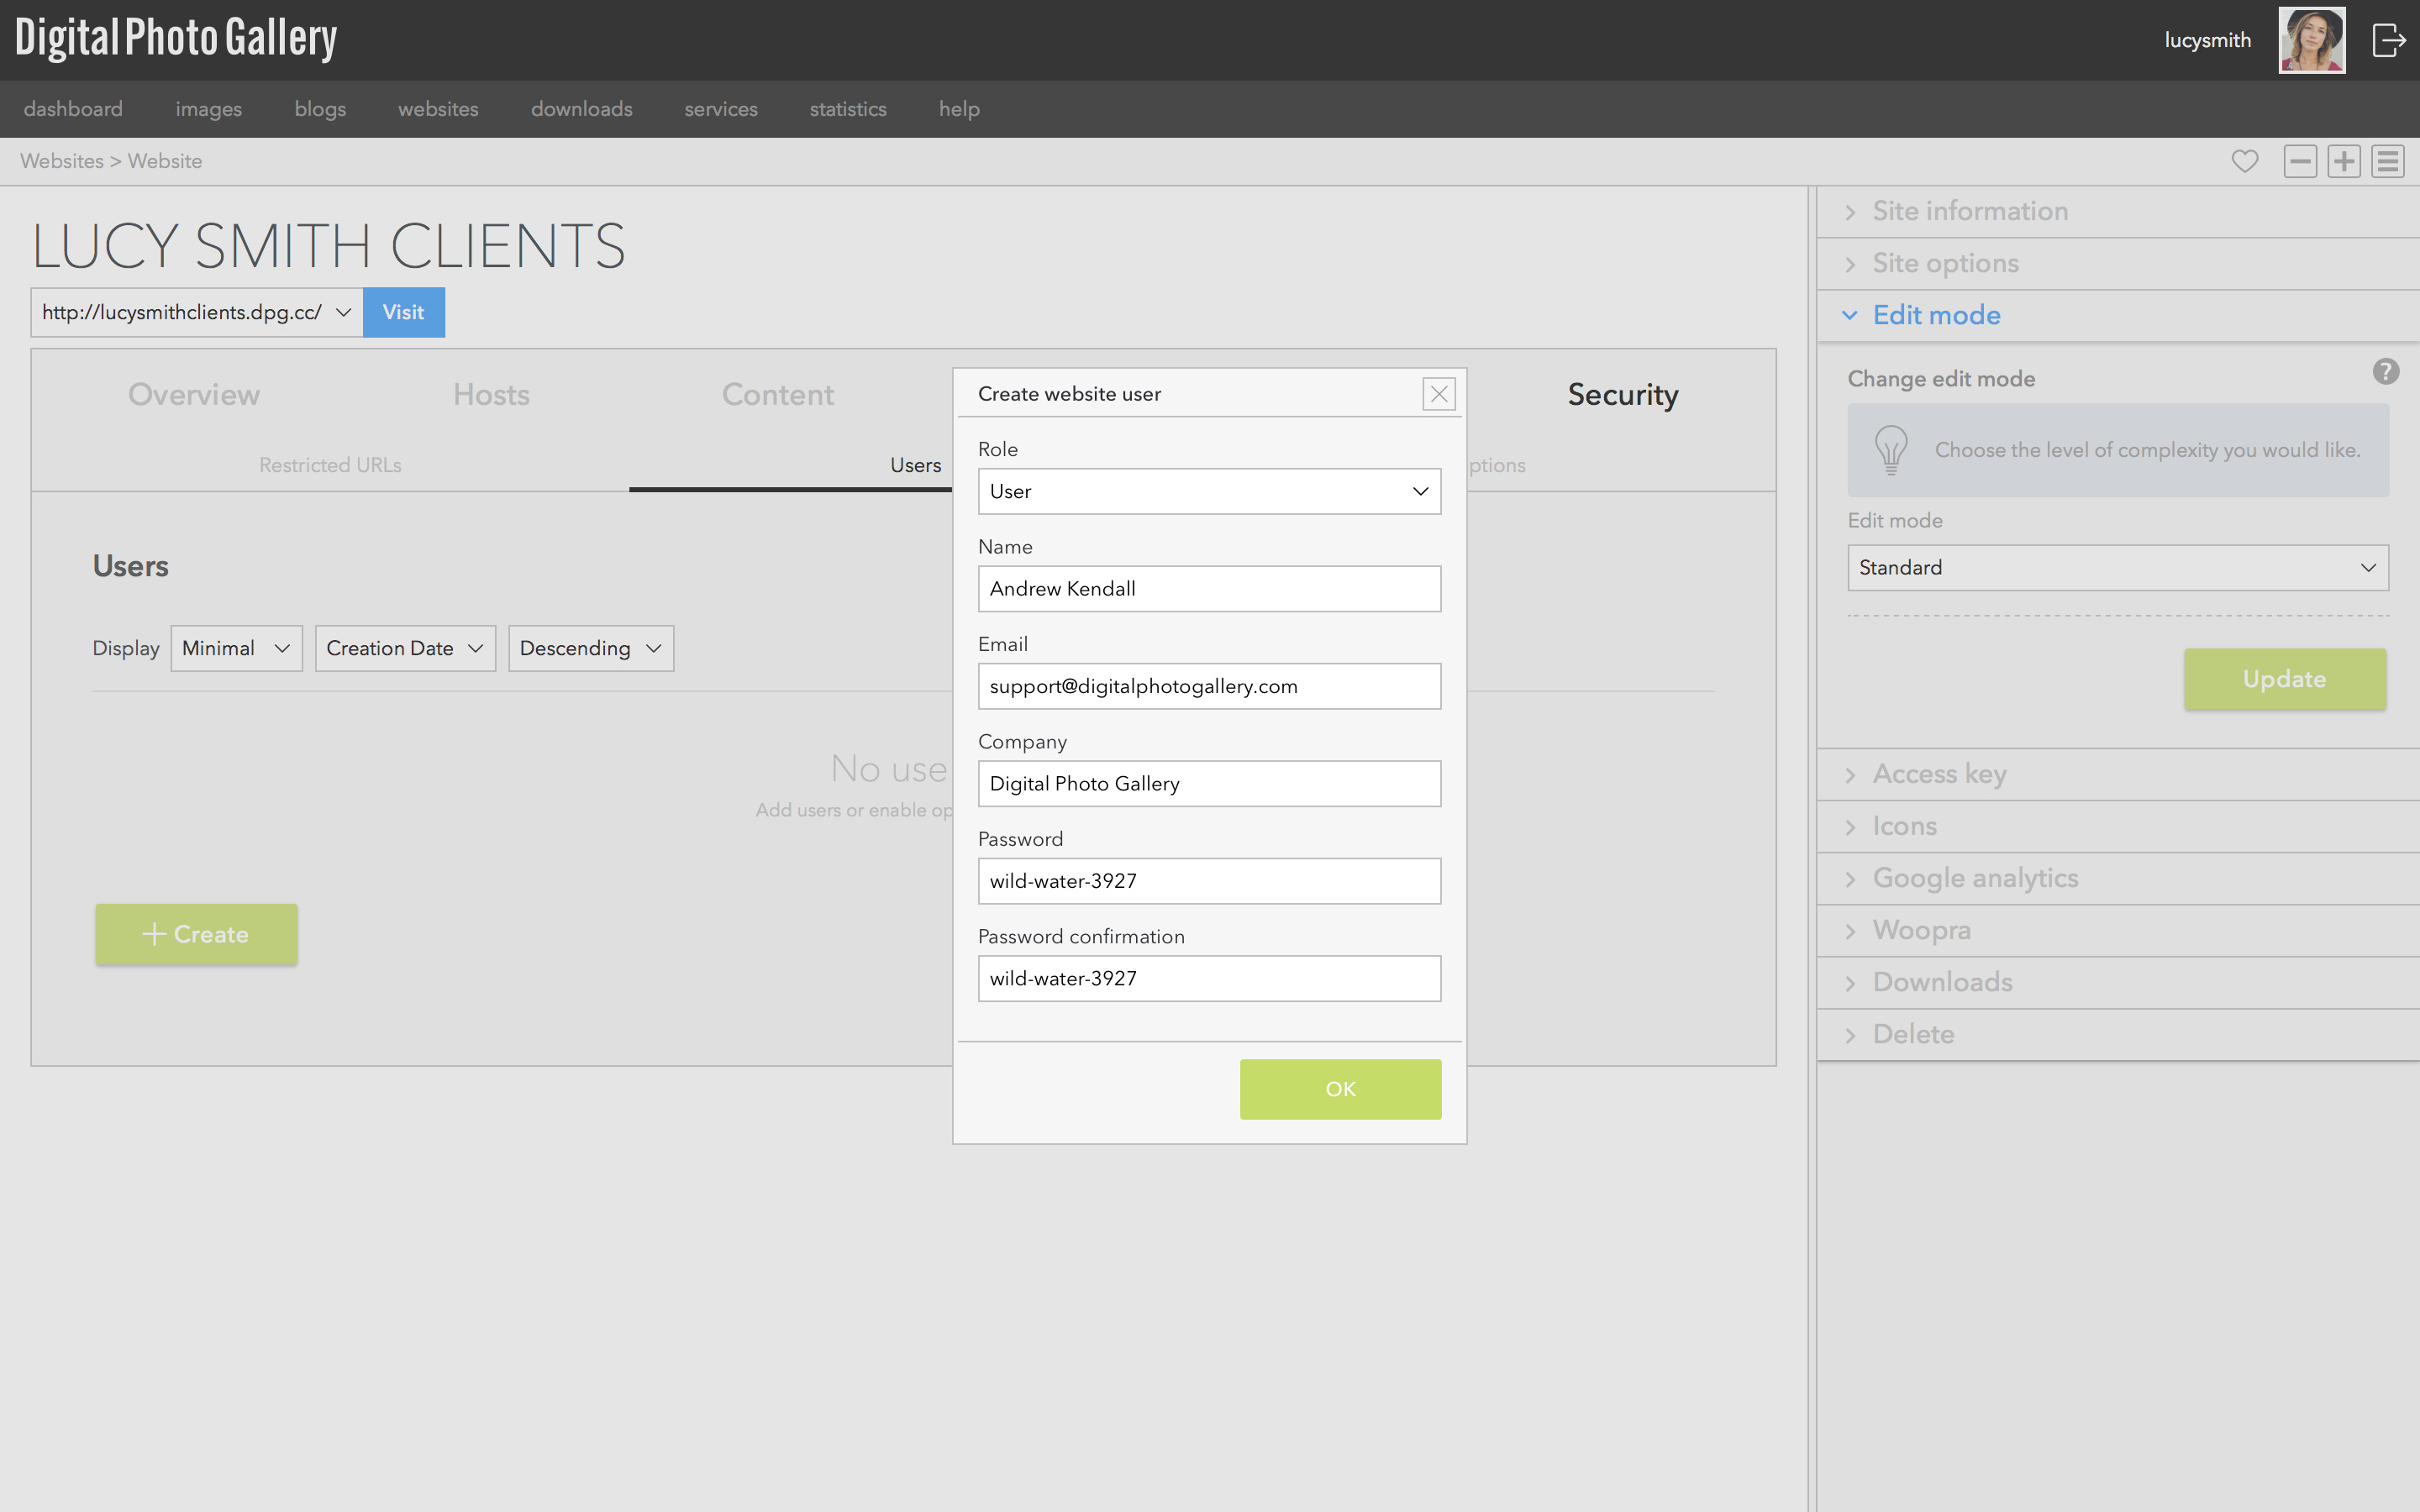
Create the users that should be able to access the project. The new users won't receive their login details until you choose to send them using the send button.
Add user to the sets
Use the Set permissions panel to add the user to the set. The user needs to be added to both the client set and the project set. You'll be able to check what they can see later.
Upload your images
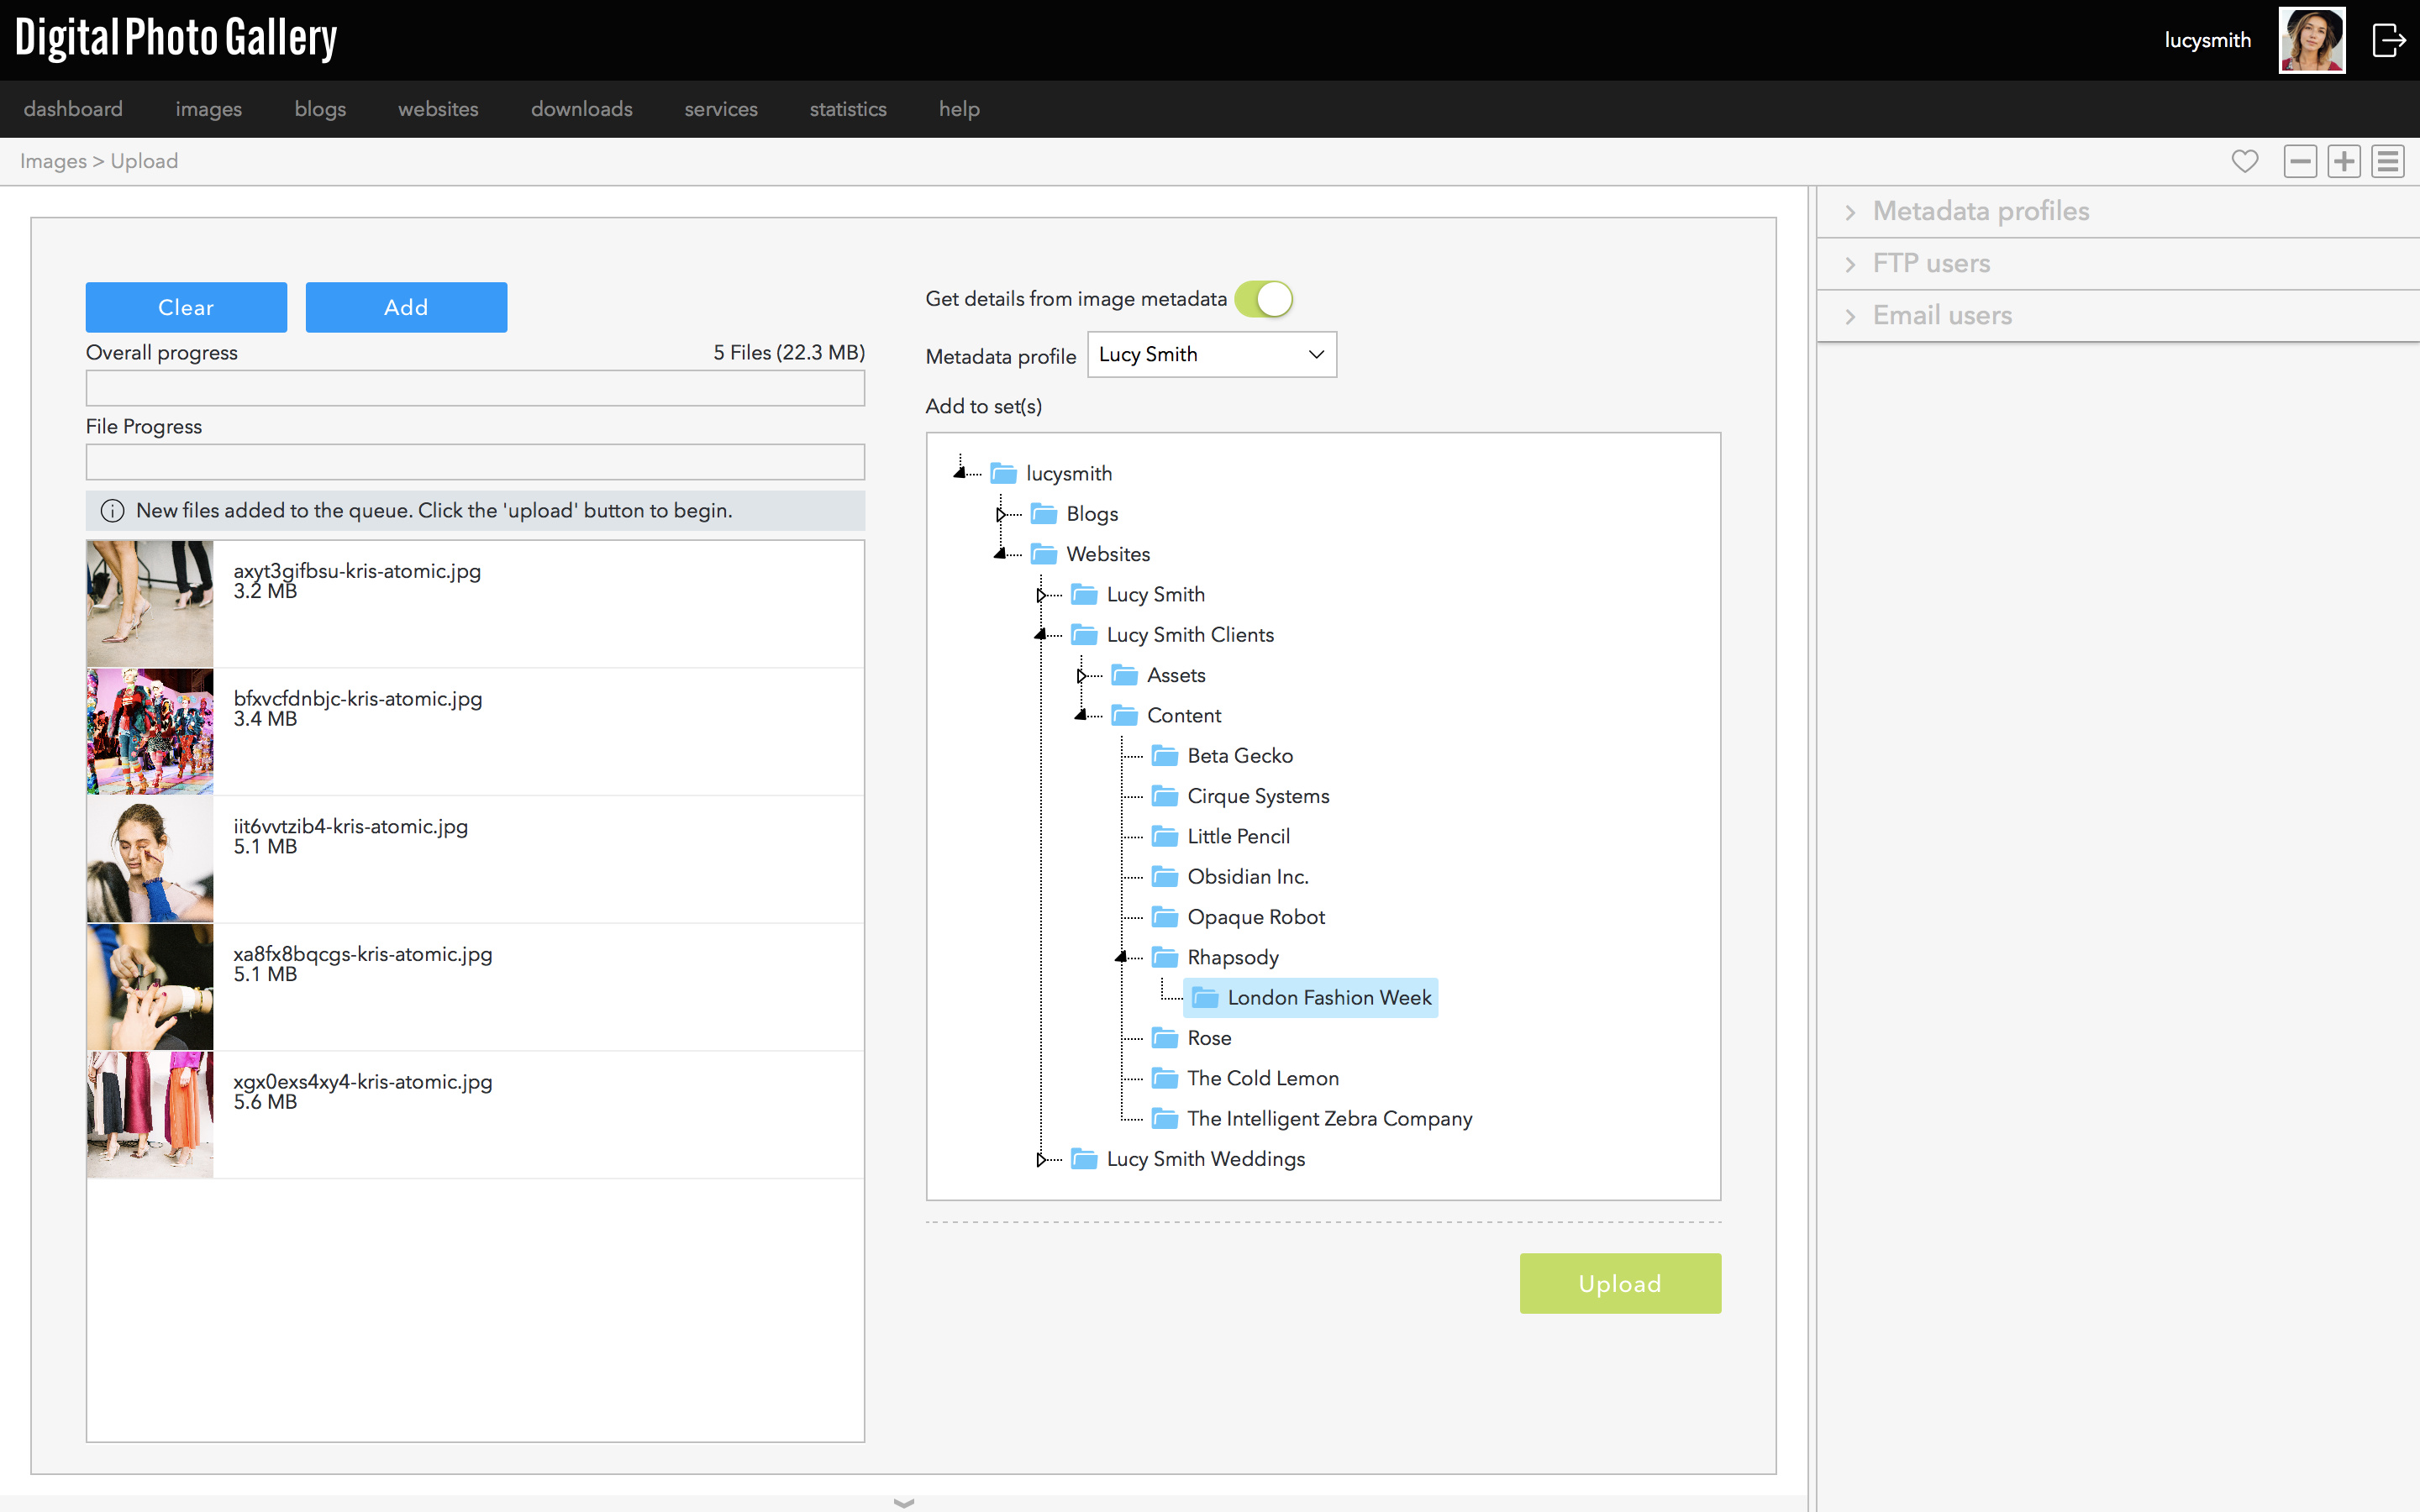
Add or upload your images to the project set.
Check what the user can see
Visit the client area and log in with the admin user you created. In the top right you can switch to view the site as any user to check what they are allowed to see.
Send the user their login

From the website's security section click Send details to send each user their login details.
Adding a public host
Before you launch your site you should always add a public host. It is indexed by search engines and content served from a public host loads faster in browsers than from a testing host.
Tracking downloads
You can know the exact moment any image has been downloaded by enabling our Slack integration.