Match these options when you create your page, replacing the title and path with your own and the group with the relevant year group.
Shared - Adding new sections
Our default templates come with various pre-set pages such as Days and Artists, but you can easily add more that are specific to your content.
These are created by using keywords and there are two different approaches:
- Simple Keywords - for content which can be described by one keyword, such as People or Fashion.
- Namespaced Keywords - for content which consists of multiple items within a category, such as artists, venues or stages.
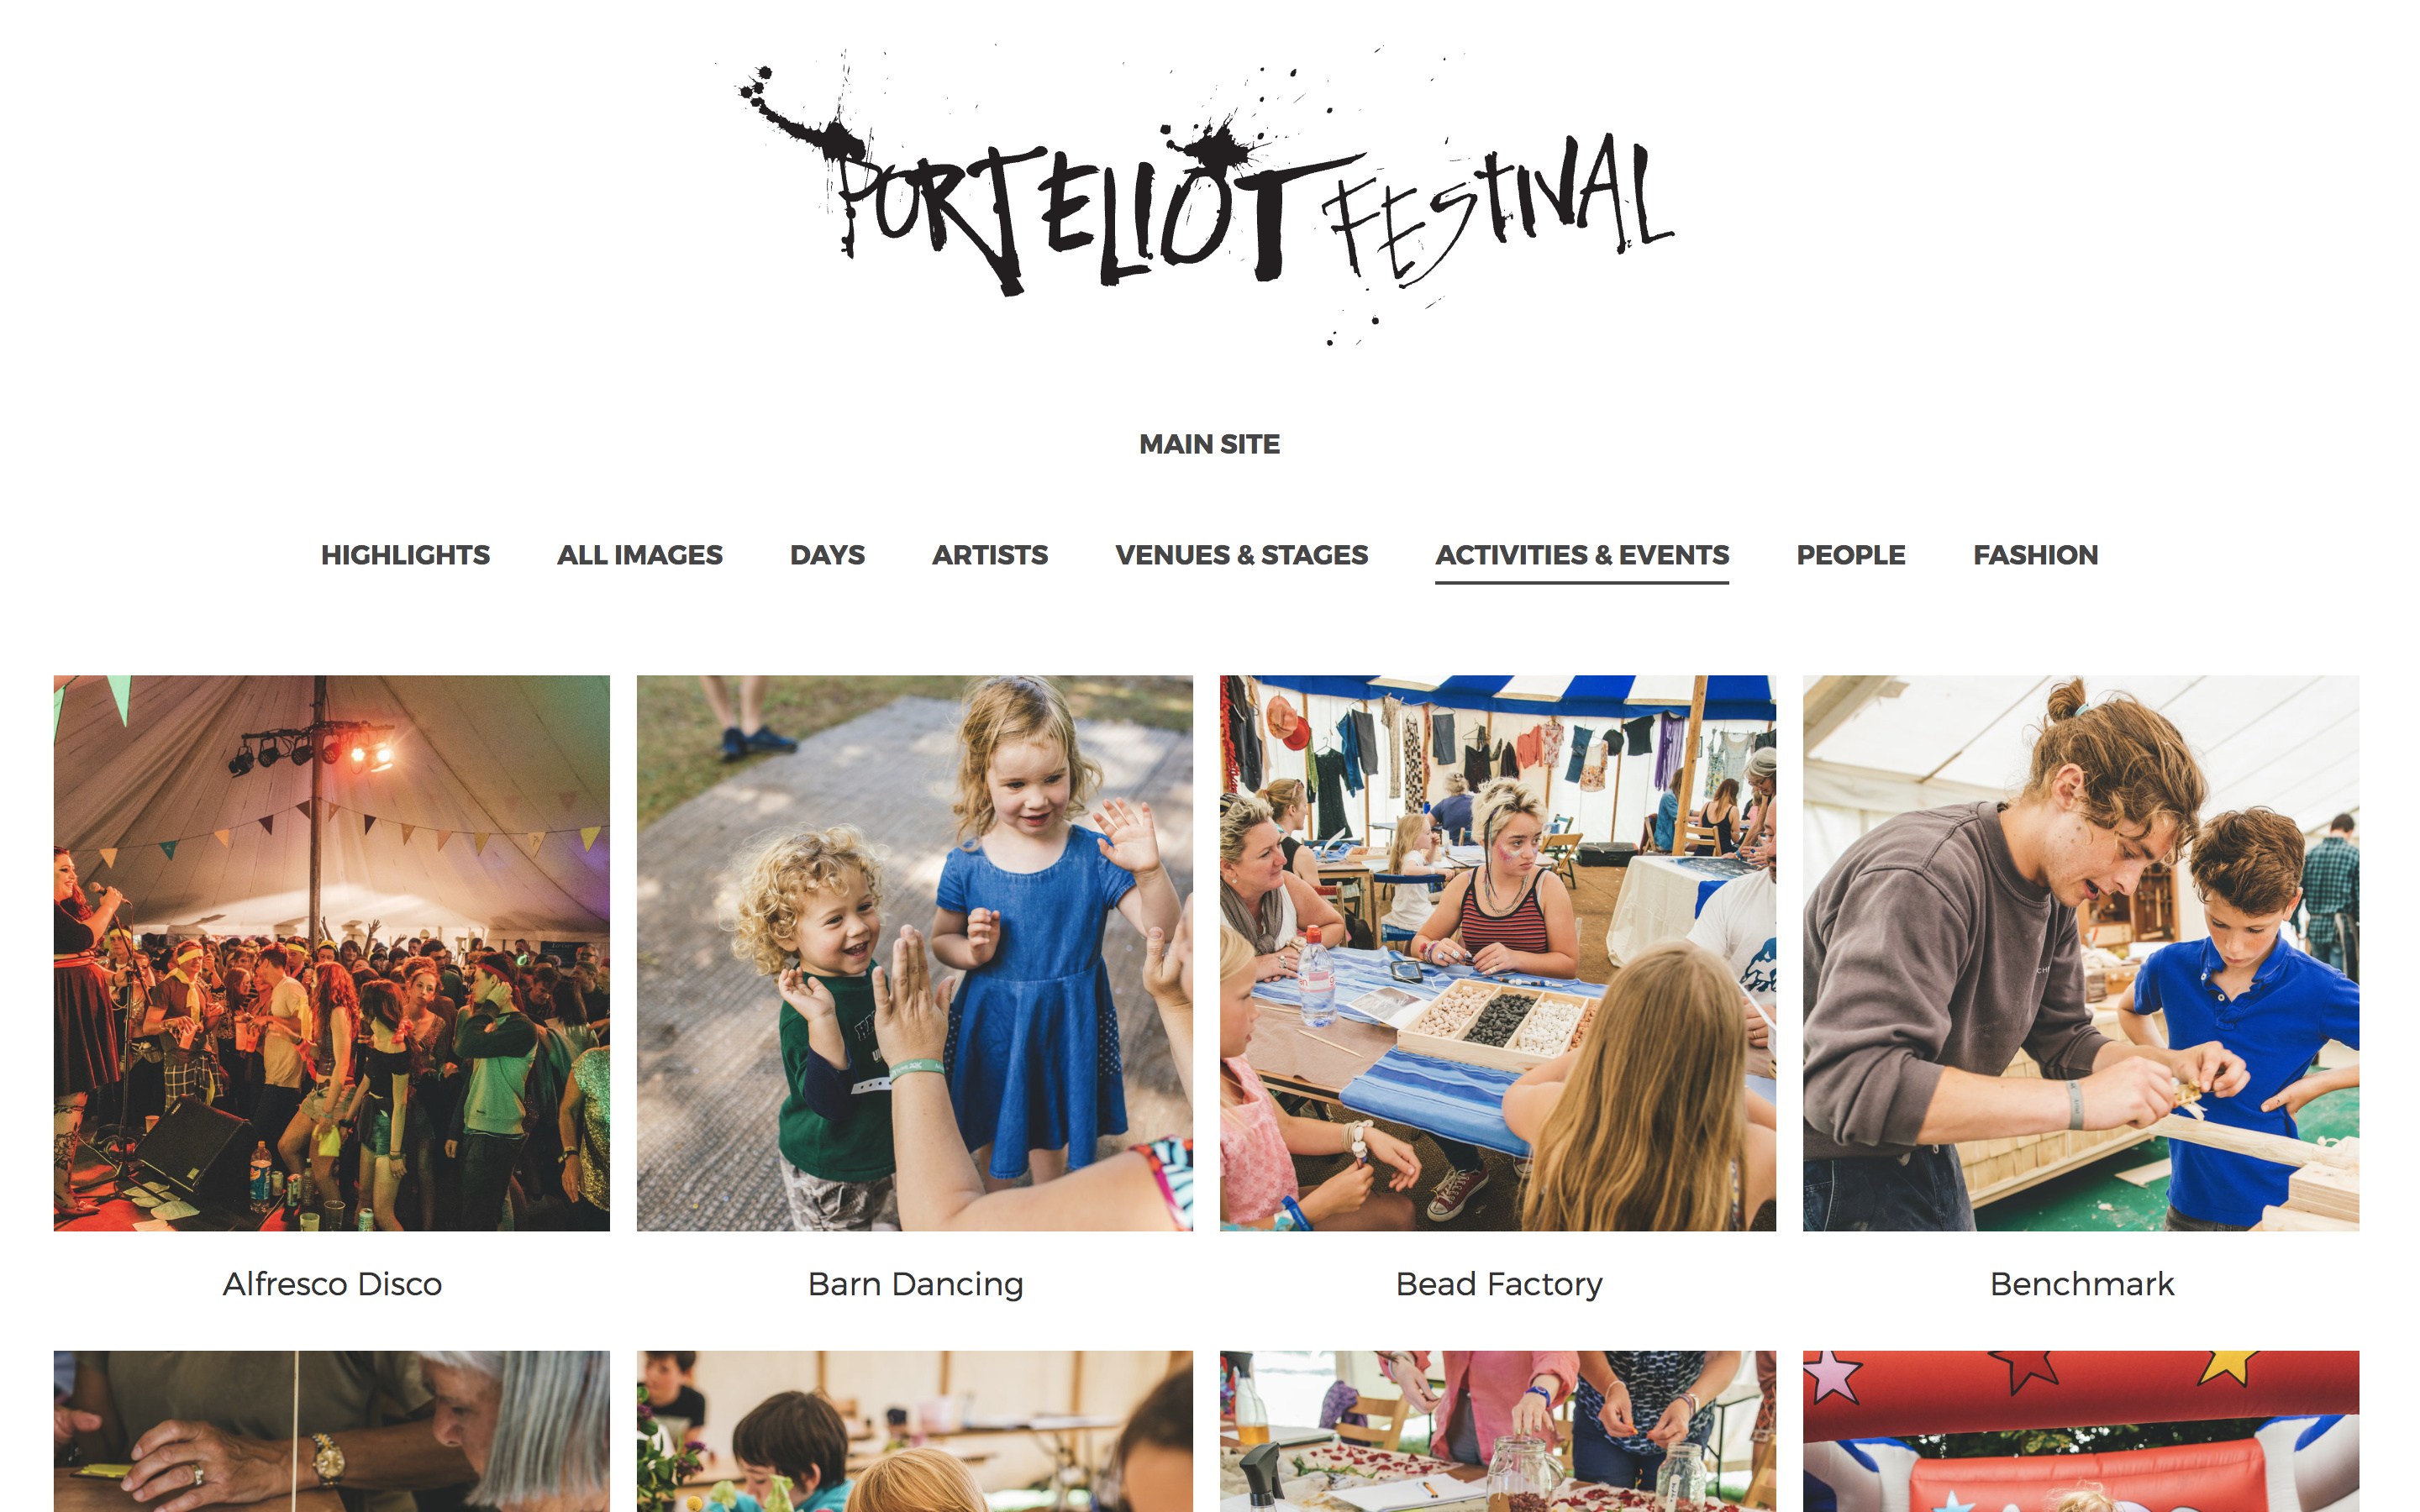 An example of a site with several custom sections.
Simple keywords
If the content can be described by an individual keyword such as Crowd, Fashion or People, then you can use a simple keyword to create a new gallery section. First, add the chosen keyword to the images that you want to show in the section.
You can preview how it will look by visiting your gallery page and adding the following string to the URL:
?image_keywords=KeywordIn the example shown below, we would add:
?image_keywords=Secret+ShowsTo add this section to the navigation, you just need to take the last part of the URL and create a navigation item for it.
Go to Content and Navigation on the website screen and click the Create button. Enter the name and URL for the new item. You'll now see your new link in the navigation.Read more:
Namespaced keywords
If you have content that you want to categorise, such as different venues or activities, then you should use namespaced keywords.
This option requires you to be in edit mode Advanced with Development enabled, learn more about edit modes here.
Namespaced keywords are displayed on a Keywords page, so we'll start by making a new one.
On the Pages screen, click the Create button.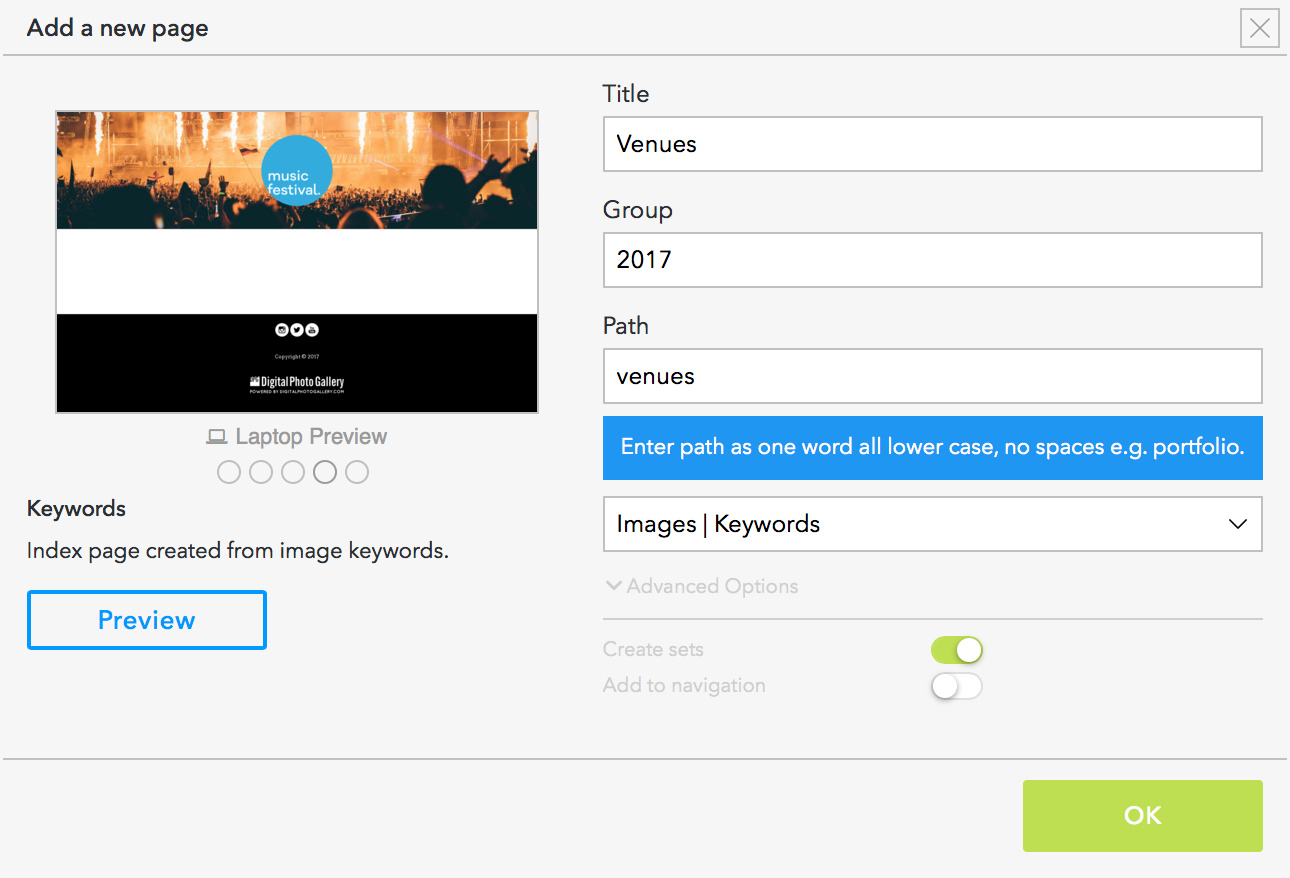
Click Add under Namespaces. This is where you enter your namespace keyword, in this case venue. This will form the first part of your keywords for this page, such as venue:The Big Tent.
You can choose the order that the namespaced keywords will appear on the page. For the Day: namespace the order should be set as Creation date.
Finally, once the new keyword page is configured, you can add a navigation item pointing to the page.